If you notice your vehicle tends to veer to one side of the trail or the other, or if you observe abnormal tire wear, it may be time to inspect your steering system. These vehicles traverse the most extreme conditions, whether at home, on the farm, or on the trails. Impacts are unpredictable, and the steering system is often the first part to suffer. You can do the alignment of your ATV wheels yourself, at home, in a simple manner.
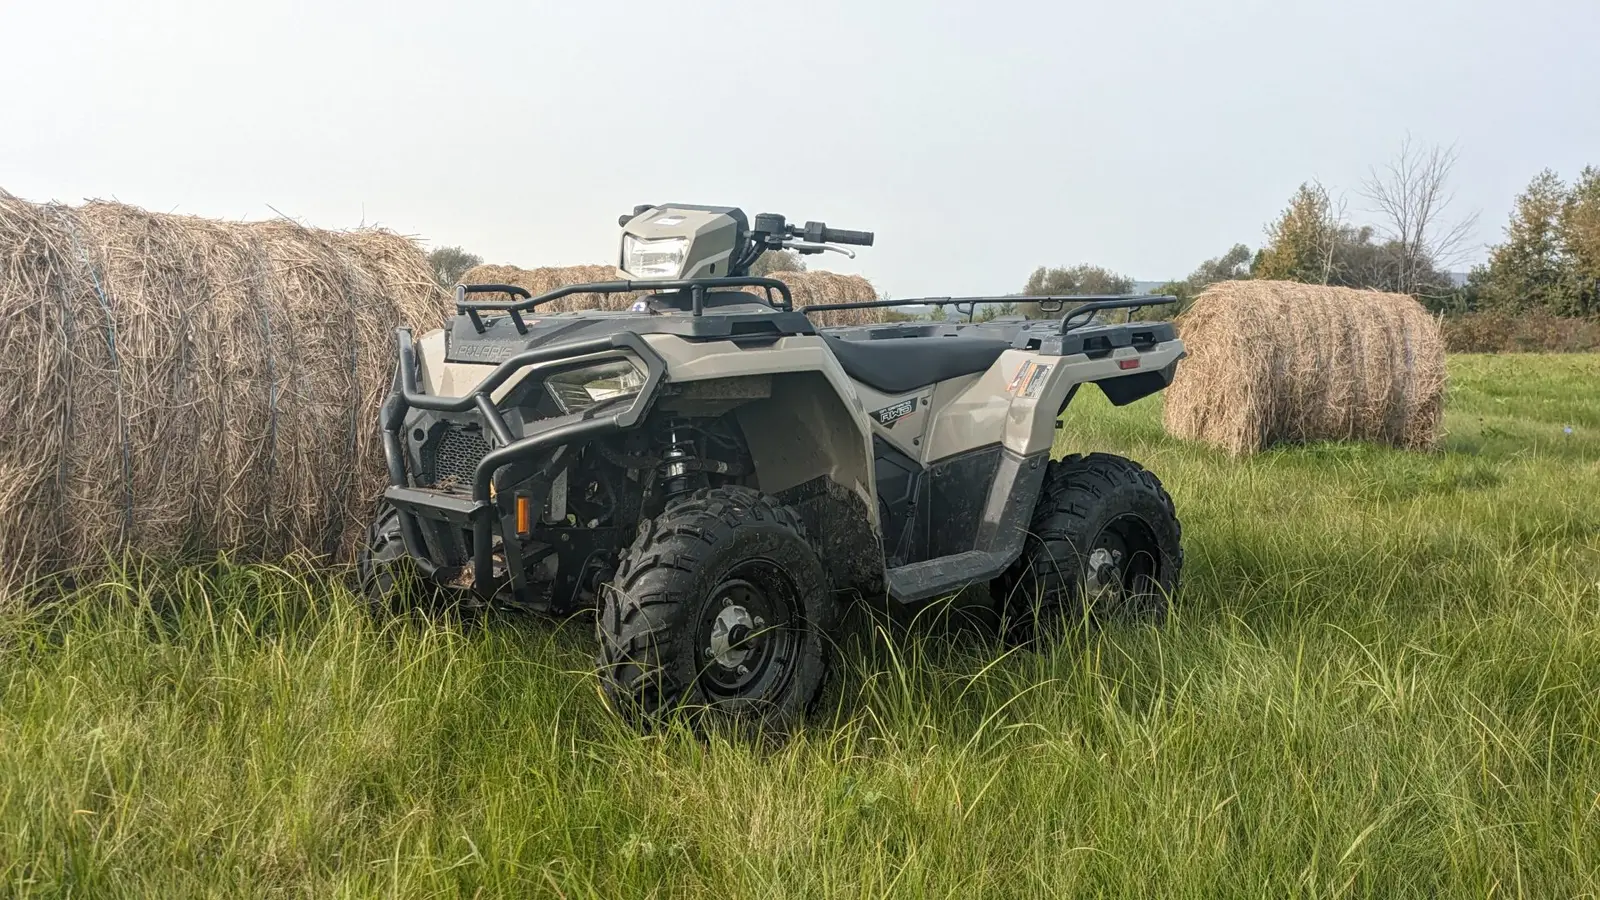
This mechanical article pertains to an ATV: the 2023 Polaris Sportsman 570. The principle remains the same, but the tools may vary for other brands or models.
Work safely and know your limits.
Difficulty level: easy
Tools required:
- 2x 3/4 wrench
- 3/8 wrench
- Thin cord or string
- Mechanic’s jack stand
- Tape measure
- Ruler
- Penetrating lubricant (optional)
Step 1: Component Inspection
Before proceeding with the alignment of your wheels, it is crucial to first check the condition of the components. Always ensure to perform the alignment with parts in good condition for optimal accuracy. For the front, we will inspect the tie rods and ball bearings, while for the rear, we will focus on the ball bearings.
Tools required:
- Floor jack and jack stands.
Steps:
- Lift the rear of the ATV to allow the wheels to clear the ground.
- Secure the ATV by placing a jack stand under the vehicle.
- Vigorously shake the front and rear wheels. From left to right: if there is noticeable play, it may be a tie rod to be replaced. Up and down: if there is noticeable play, it may be the wheel bearing to be replaced or adjusted.
- Ensure that the air pressure is at the correct value for all tires. The recommended values are indicated on the tire sidewalls.
- Once you have determined that everything is in good condition, you can proceed with the alignment.
- Lower the vehicle to the ground.
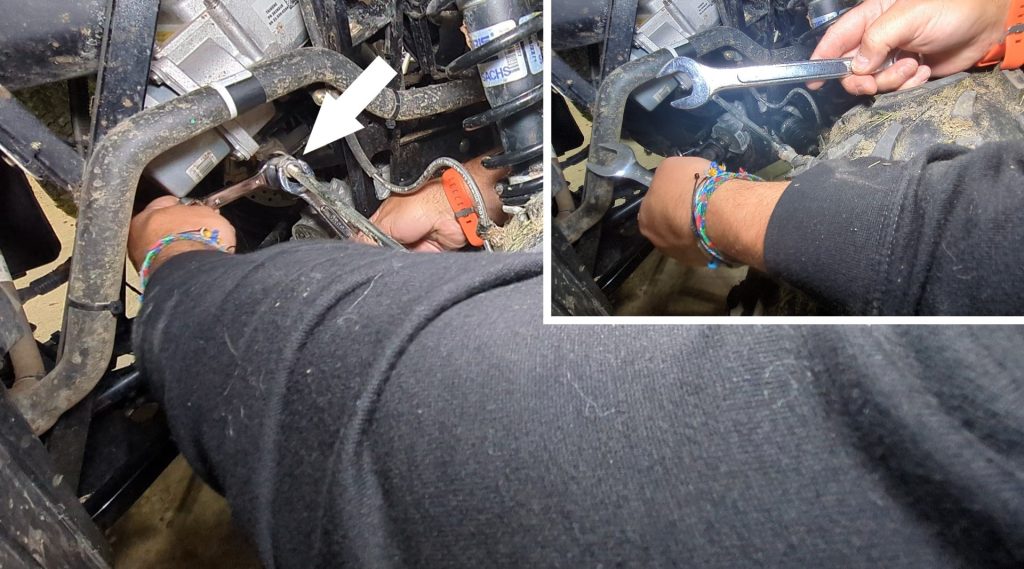
Step 2: Unlocking the Tie Rods
Now, let’s proceed with the alignment of your wheels. To preserve the preliminary adjustments we are about to make, please unlock the nuts of the tie rods.
Tools required:
- 2x 3/4 wrench
- Penetrating lubricant
Steps:
- Before starting, if you notice rust on the parts, apply a penetrating lubricant, which will make your task easier later on.
- At each end of the tie rods, you will have 1 nut.
- One nut is threaded in the opposite direction to the other. If you are unable to loosen it, try turning it the other way.
- Place a 3/4 wrench on a ball joint and another 3/4 wrench on the nut and loosen them.
- Repeat the same operation for the other tie rod on the opposite side of the vehicle.
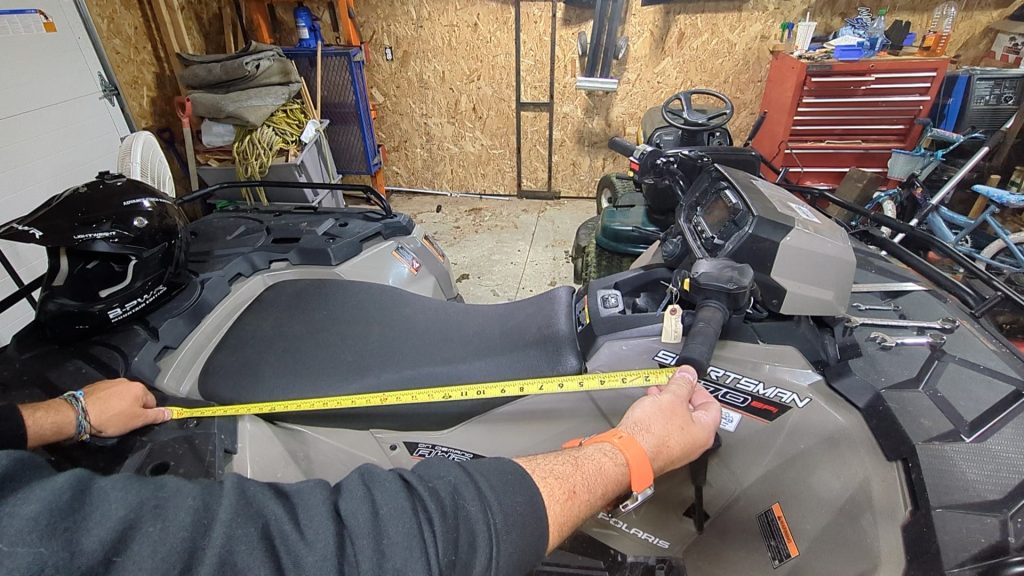
Step 3: Centring the Handlebar
It is essential to start in the correct initial position. Here is how to adjust the handlebar to be as straight as possible:
Tools required:
- Tape measure
Steps:
- Position the handlebar as straight as possible by eye.
- Identify two symmetrical points on the vehicle that you can use for measurements.
- Once the points are marked, measure the distance between the end of the handlebar and each point. Repeat the same procedure on the other side. Compare the measurements to ensure they are identical on each side. At this point, the handlebar will be perfectly aligned.
- Be careful not to bump the handlebar during work, as you will need to restart the alignment process.
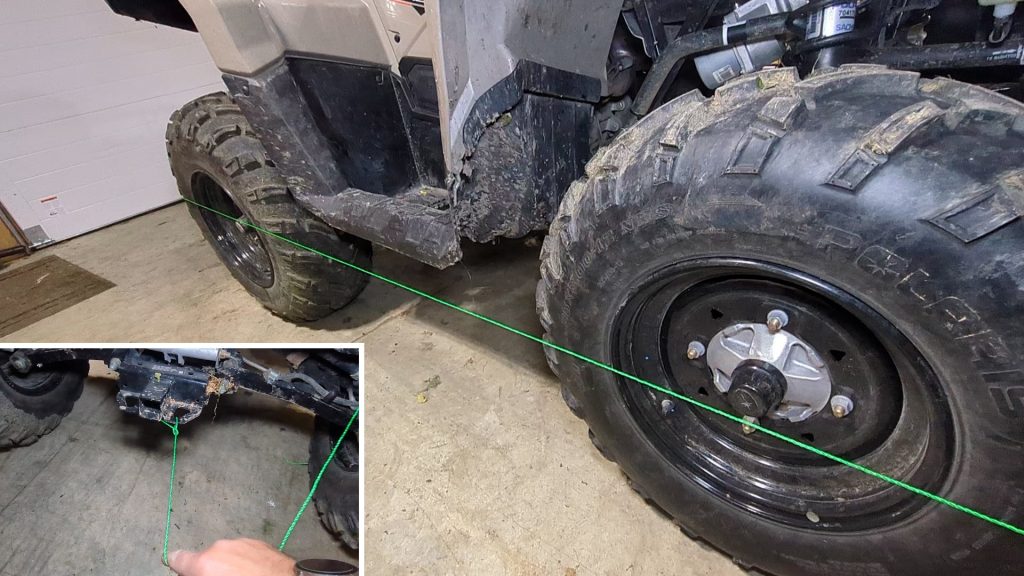
Step 4: Position Your Cord
The cord will be used to take lateral measurements.
Tools required:
- Thin cord or string
- Mechanic’s jack stand
Steps:
- At the rear, if your ATV is equipped with a trailer hitch, attach the cord to this point.
- If you do not have this option, use a jack stand as an alternative to start.
- The cord should pass through the centre of the rear and front wheels. Head towards the front of the ATV and attach the other end of the cord to another jack stand.
- Ensure that the cord is properly tensioned to remain as straight as possible.
Step 5: Reading and Adjustment
The cord will be used to take measurements.
Tools required:
- Rule or tape measure
- 3/8 wrench
Steps:
- Ensure that the cord is properly tensioned to be as straight as possible.
- On one of the front wheels: use a rule or tape measure and take the measurement of the distance between the rim and the cord.
- The front of the wheel should point outward.
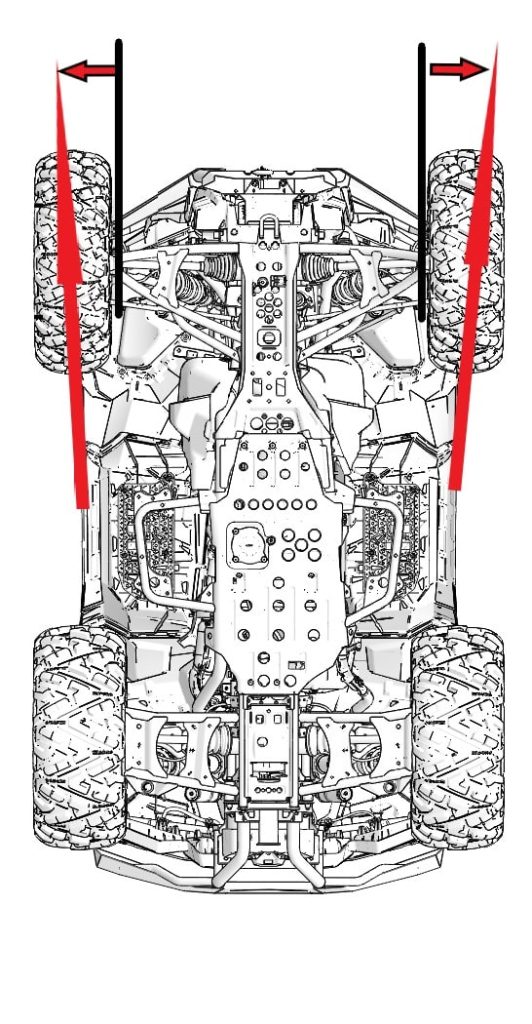
- The measurement should be smaller at the front compared to the rear measurement. APPROXIMATELY 1/16 or 2 MM.
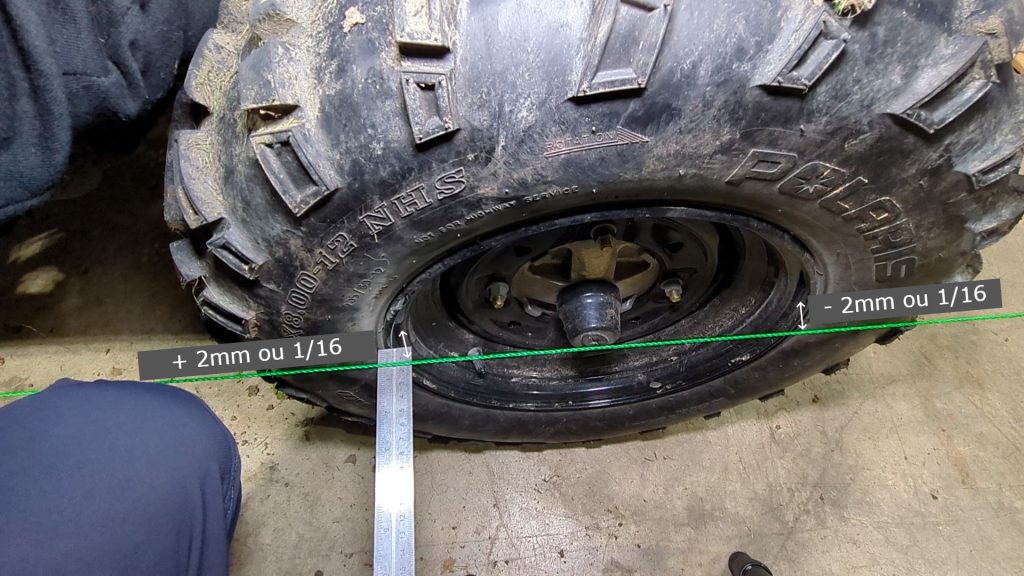
- Screw or unscrew the tie rod to the desired value. Use the 3/8 wrench as needed to rotate the tie rod.
- Repeat the operation on the opposite side of the ATV.
- ALWAYS CHECK THAT YOUR HANDLEBAR IS WELL CENTRED.
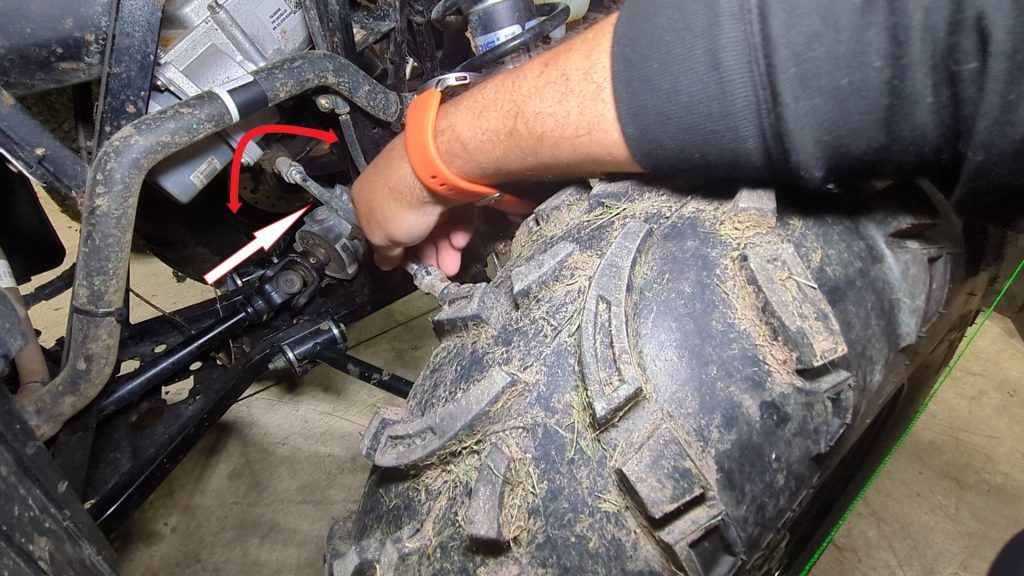
Step 6: Locking the Nuts
Tools required:
- 2x 3/4 wrench
Steps:
- Once everything is adjusted according to your values, you can proceed to lock the nuts.
- Hold the ball joint with one wrench and lock it using the second one. Repeat this operation for each end of each tie rod.
- Perform a road test to ensure that the work is flawless.

IMPORTANT always follow the manufacturer’s specifications for torque values.
I am convinced that there are other methods for the alignment of wheels on an ATV. I have shared my own approach in order to provide you with a guide or an idea of what to expect when performing this task. You may need to make this adjustment several times throughout the life of your vehicle, so why not do it yourself? As you can see, this task requires few tools and is not overly technical. By daring to venture into the mechanics of your vehicle, you will gain confidence and could even save money.
If you are not confident in performing these tasks, do not hesitate to contact your dealer. They will help you.
Thanks to Polaris Industries for the Polaris Sportsman 570, for these chronicles.
Have a great quad season!
A Video Guide to the Alignment of Wheels on Your ATV
In the meantime, here is a video that will guide you through the steps: