Whether your ATV or side-by-side is brand new or a bit aged, your brakes are your safety lifeline. You should always be aware of their condition because your life and the lives of others depend on it. Be proactive instead of reactive. Additionally, by performing this inspection regularly, you reduce the risk of breakdowns far from home.
Throughout this article, I will guide you step by step, following my mantra: work safely and know your limits.
The difficulty level of this maintenance ranges from easy to moderate.
Required Tools:
- Wire cutters
- Pliers
- Ratchet wrench
- A 4 or 6-inch extension
- 1/2 inch, 12 mm, 14 mm sockets
- 5 mm hex key (Allen wrench)
- Flathead screwdriver
- Floor jack and Jack stand
- Thread locker
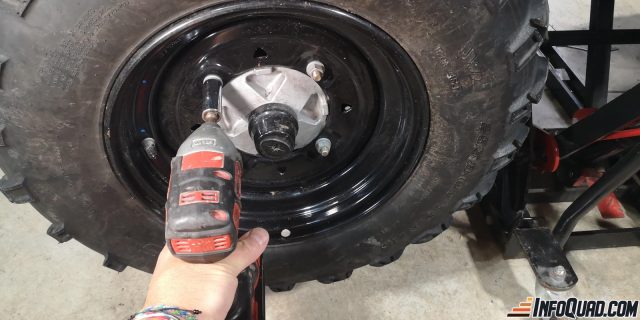
#1: Unlocking Wheel Nuts
Required Tools:
- Ratchet wrench with a 4 or 6-inch extension
- 14 mm socket
Steps:
- Before lifting the ATV, take advantage of its resting position to loosen each wheel nut.
- Use the ratchet wrench to unscrew each wheel nut by half a turn that you’re going to remove.
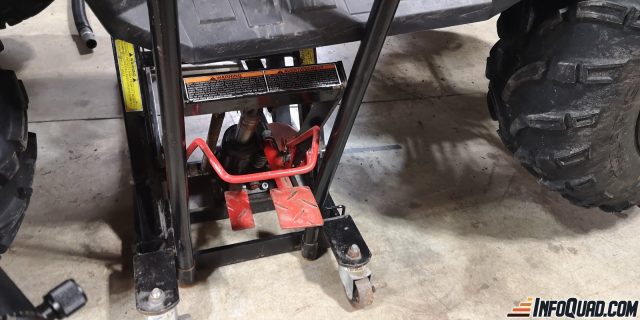
#2: Lifting and Securing the Vehicle
Required Tools:
- Floor jack and Jack stand
Steps:
- Lift the ATV to allow the wheels to clear the ground.
- Secure the ATV’s position by placing a jack stand under the vehicle if necessary.
#3: Wheel Removal Required Tools:
- Ratchet wrench with a 4 or 6-inch extension
- 14 mm socket
Steps:
- Finish removing the previously loosened nuts and set them aside.
- Remove the wheel.
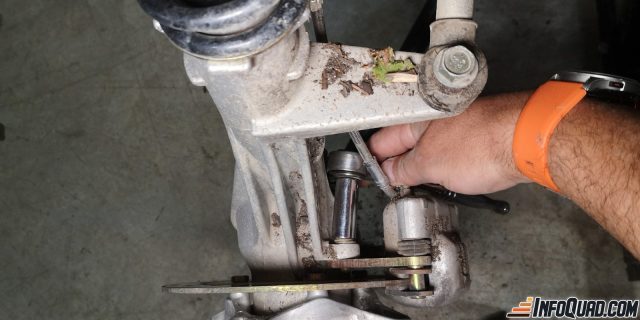
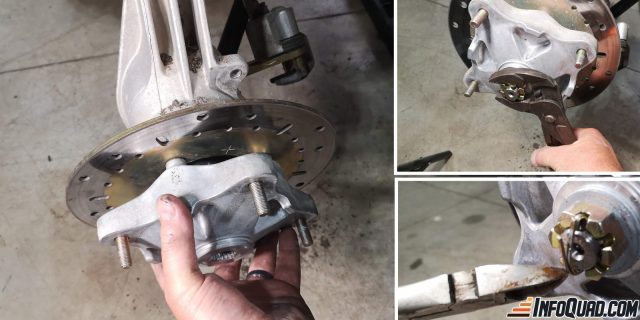
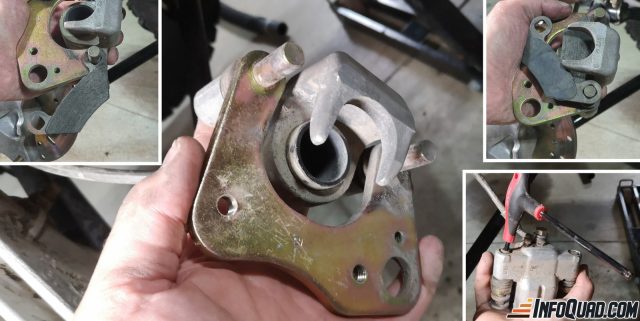
#4: Caliper Removal Required Tools:
- Ratchet wrench with a 4 or 6-inch extension
- 1/2-inch socket
Steps:
- Identify the two attachment bolts at the back of the hub and calliper.
- Use the wrench and socket to unscrew these two bolts.
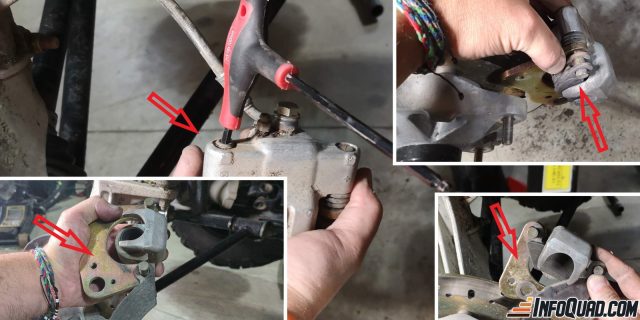
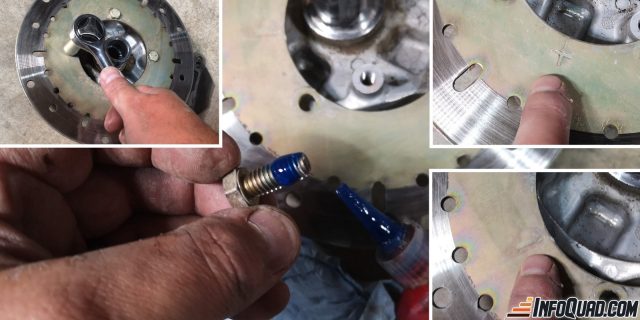
#5: Removing Brake Pads Required Tools:
- 5 mm hex key
Steps:
- At the back of the calliper and the end, you’ll find a hex head bolt.
- Insert the hex key, unscrew the safety bolt, and set it aside.
- Apply tension to the metal plate to allow the pin to come out.
- Slide one pad out, then remove the other.
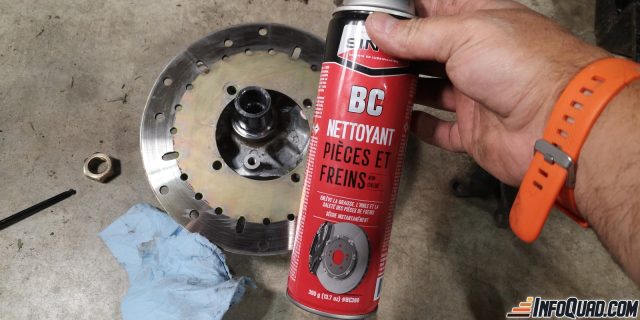
- Inspect, clean, or replace the pads as needed. For cleaning, always use a brake parts cleaner.
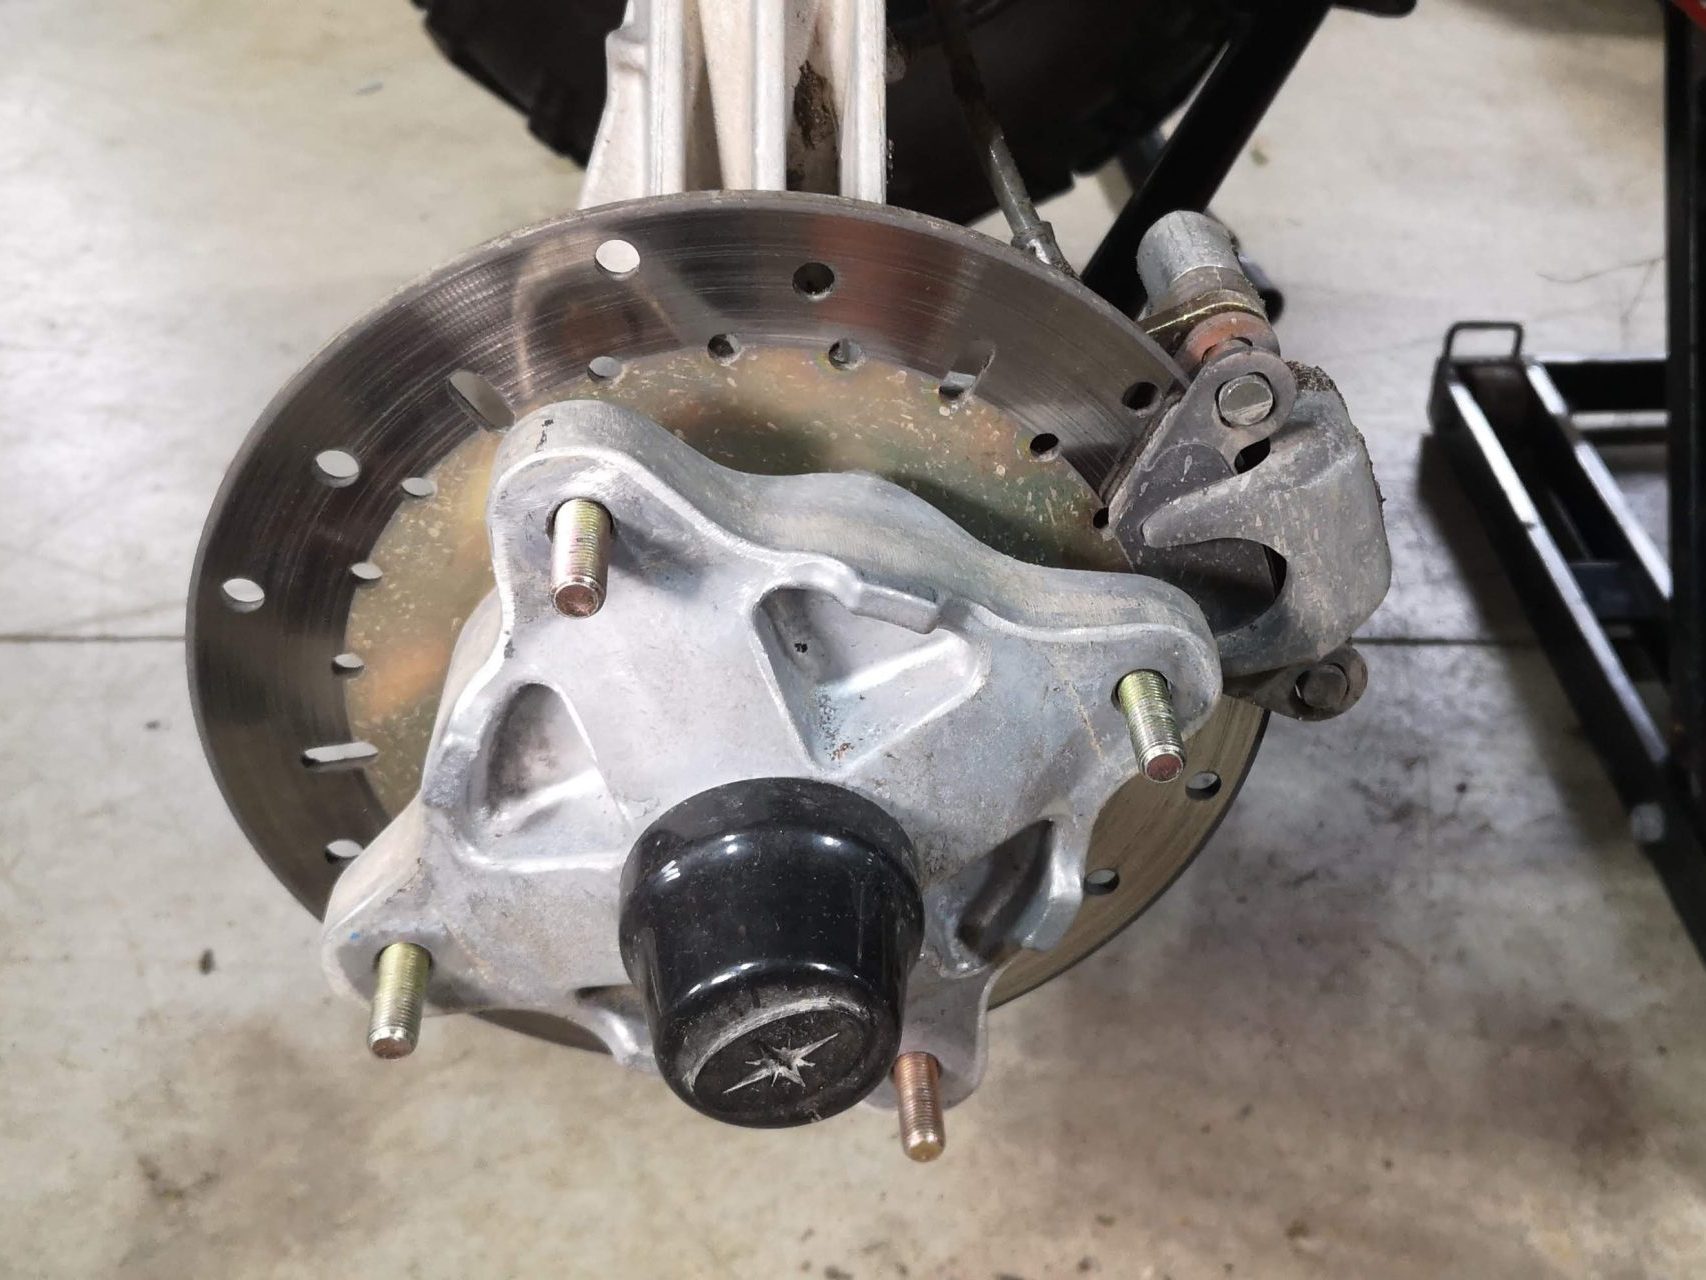
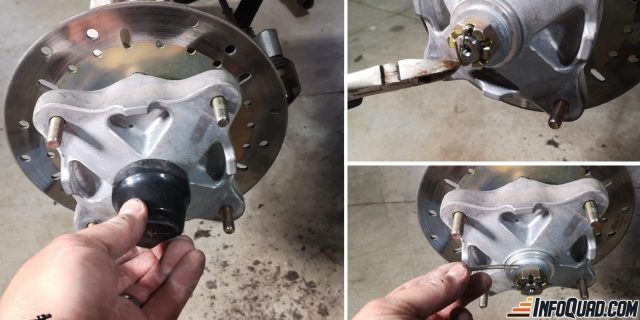
#6: Hub Removal
Required Tools:
- Pliers
- Wire cutters
- Soft-faced hammer
Steps:
- Remove the protective cap.
- Use a pair of pliers to straighten the pin’s ends.
- Slide the pin out and keep it aside.
- Use the pliers again to unscrew the central nut.
- Remove the nut and washer, and set them aside.
- Now, you can remove the hub. If necessary, a soft-faced hammer can help in separating them.
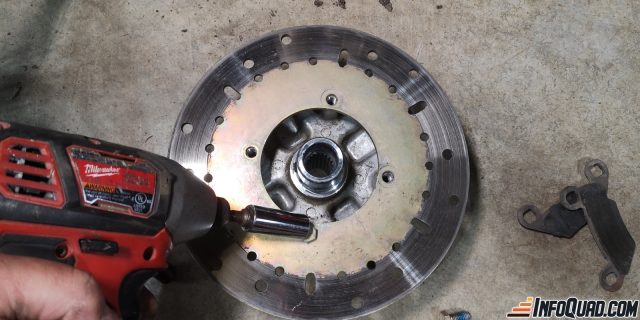
#7: Removing Brake Disc
Required Tools:
- 1/2-inch socket, an extension, and a ratchet wrench
Steps:
- Turn the hub so that you can see the brake disc entirely.
- Unscrew the bolts and set them aside.
Inspect, clean, or replace the pads, as needed. For cleaning, always use a brake parts cleaner.
Reassembling the Brake System.
Always follow the manufacturer’s recommended torque specifications.
#8: Reattaching the Brake Disc Required Tools:
- 1/2-inch socket
- Thread locker
Steps:
- After cleaning the disc, you can proceed with its installation.
- Apply a thread locker of the same color as the bolt. If in doubt, consult your dealer.
- Ensure that the disc is oriented correctly. Here, a “—” points towards the vehicle, and a “+” points outward.
- Tighten the bolts.
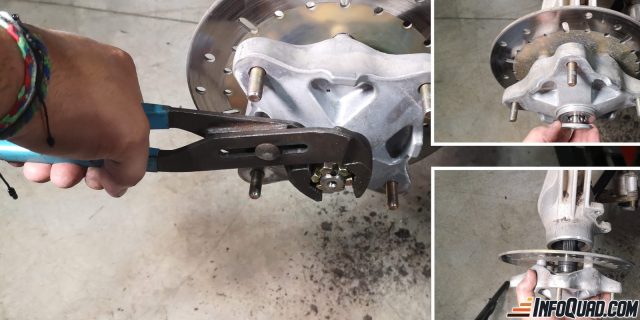
#9: Reattaching the Hub
Required Tools:
- Adjustable pliers
- Wire cutters
Steps:
- Slide the wheel spindle into the hub.
- Install the washers and the nut.
- With pliers, tighten the nut firmly for the first time to bring the components together.
- Loosen it by half a turn and turn the hub several times.
- Tighten it again, but this time, stop as soon as you feel resistance while turning the hub.
- Note that there are recesses on the nut and holes on the wheel spindle. Find a recess and a hole on the wheel spindle that align perfectly.
- Insert the pin completely and fold it over itself.
- Replace the protective cap.
#10: Installing Pads and Caliper
Required Tools:
- 5 mm hex key
- Large flathead screwdriver
Steps: (Reverse of Disassembly)
- Place the first pad on the first guide and pivot it onto the second guide.
- Reattach the hexagonal safety bolt.
- Put the calliper back in place.
- If there’s not enough space between the pads or if it’s too tight, use a flathead screwdriver to apply pressure to the pads so the piston goes into the calliper.
- Install the two attachment bolts.
- Ensure the hub turns freely; you may feel a slight resistance, but it should disappear during the road test.
#11: Wheel Installation
Required Tools:
- Ratchet wrench with a 4 or 6-inch extension
- 14 mm socket
Steps: (Reverse of Disassembly)
- Install the wheel.
- Hand tightens the nuts.
- Lower the vehicle to the ground.
- Finish tightening the wheels to the correct torque.
Perform a road test to ensure the work is successful.
IMPORTANT: Always follow the manufacturer’s specifications for torque.
The Benefits of Regular Brake Maintenance
Maintaining your brakes are not a task to be overlooked; it’s a matter of safety. This task is simple and cost-effective, providing you with nothing but benefits. Your braking will be more precise and faster. If you ride in mud or snow, I recommend performing this maintenance more frequently. Dare to venture into your vehicle’s mechanics. You’ll gain confidence and may even save money.
Here’s a link to the video version of this maintenance:
To Conclude
If you are not comfortable performing these tasks, don’t hesitate to contact your dealer; they will assist you.
A big thank you to Polaris Industries for providing the Polaris Sportsman 570, which allowed me to conduct these mechanic tutorials.