Table of contents
Toggle- Tools and Materials Required
- Inspecting and Greasing Your Trailer’s Wheel Bearings
- Removing the Bearing
- Inspecting the Bearing
- Greasing Bearings and Reinstalling the Hub
- Tire Inspection
- General Trailer Inspection
- Suspension Inspection
- Lights and Electrical System
- The Importance of Trailer Maintenance for Hassle-Free Trips
- Keep Reading
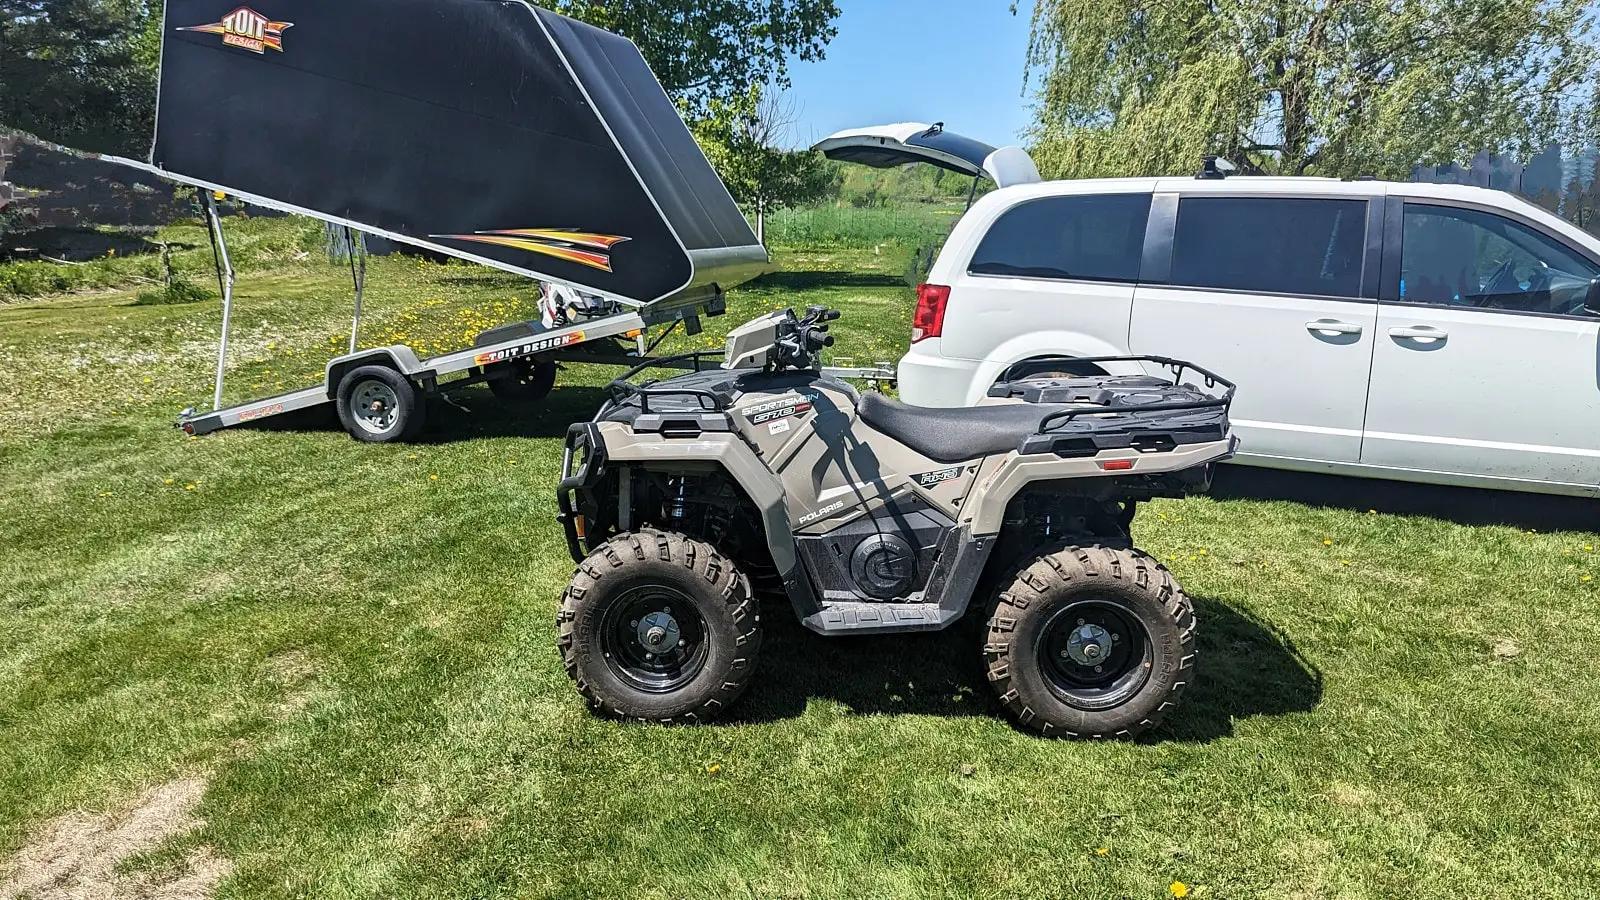
Your trailer is essential for transporting your quad, keeping it clean, protected from the elements, and safe from theft. However, neglecting trailer maintenance can turn your trips into nightmares with unexpected breakdowns. To help you avoid such troubles, here’s a comprehensive guide to keep your trailer in top condition. Follow these tips to ensure the safety and longevity of your equipment.
Work safely and know your limits.
Difficulty Level: Easy to Moderate
Tools and Materials Required
- Adjustable pliers
- Protective gloves
- Flathead screwdriver
- Hammer
- Cold chisel
- Floor jack and jack stands
- Rag
- Bearing grease
- Dielectric grease
- Grease gun
- Brake cleaner
- Lug nut socket for your trailer and breaker bar
- Wheel chocks, trailer wheel blocks, wooden blocks, or bricks
- Notebook and pencil
- Flashlight
- Large pry bar or tire iron
- Soldering iron
- Multimeter or test light
- Electrical wires
- Dielectric grease
- Heat-shrink tubing
- Fuse
Inspecting and Greasing Your Trailer’s Wheel Bearings
Pre-Disassembly Steps
Loosen the wheel nuts. Perform this step while the trailer is on the ground to prevent the wheel from spinning when applying force.
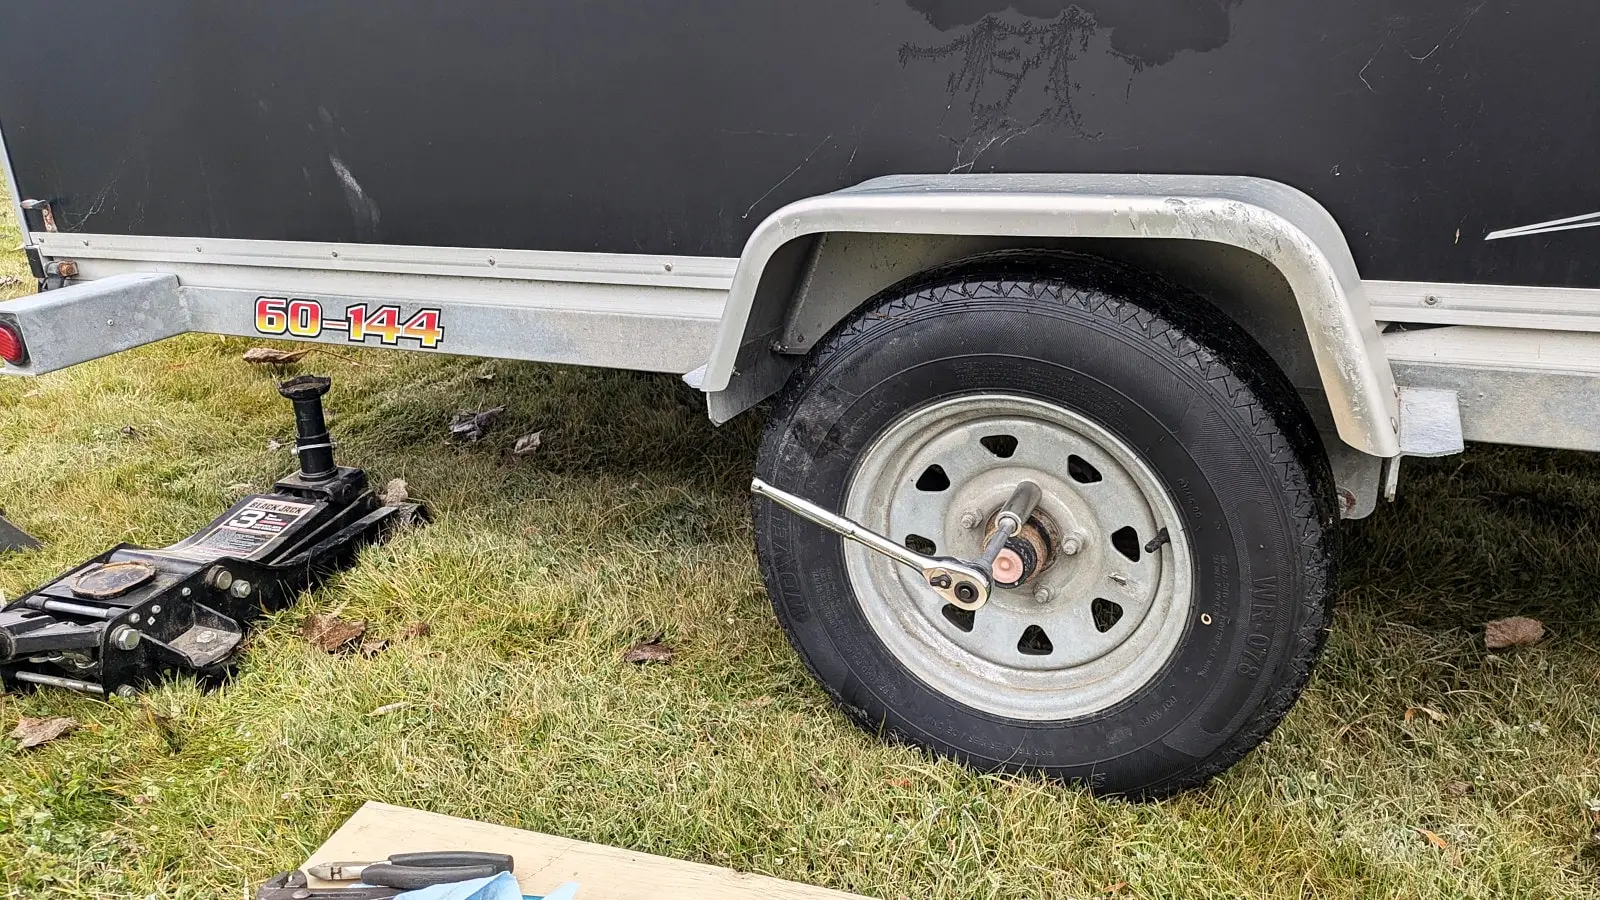
Tools
- Lug nut socket for your trailer and breaker bar
- Wheel chocks, trailer wheel blocks, wooden blocks, or bricks
Steps
- Place wheel chocks to prevent the trailer from moving or shifting.
- Using the lug nut socket and breaker bar, loosen the wheel nuts of the wheel you’re about to disassemble. A turn or two should suffice.
Rising and Securing the Trailer
For better stability and added safety, leave the trailer attached to your vehicle.
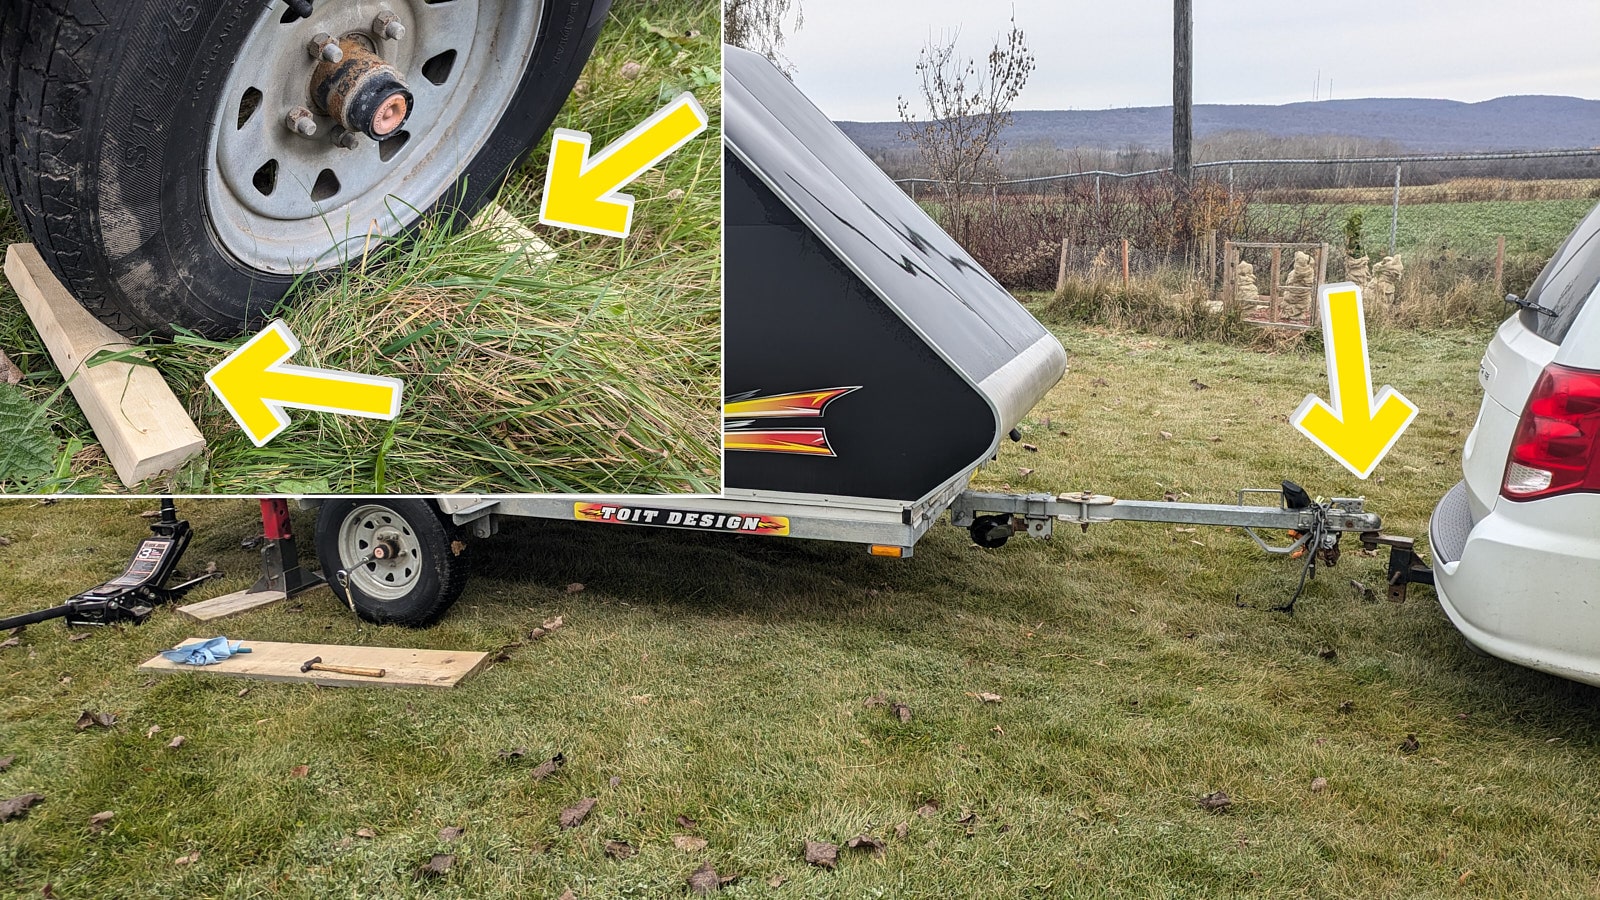
Single Axle
- Place wheel chocks to prevent the trailer from moving or shifting.
- Using a jack, lift the rear corner of the trailer near a wheel and set it on a jack stand. Repeat the process to lift and secure the front of the trailer if it’s not attached to a vehicle.
- Once raised, the trailer wheel will be free.
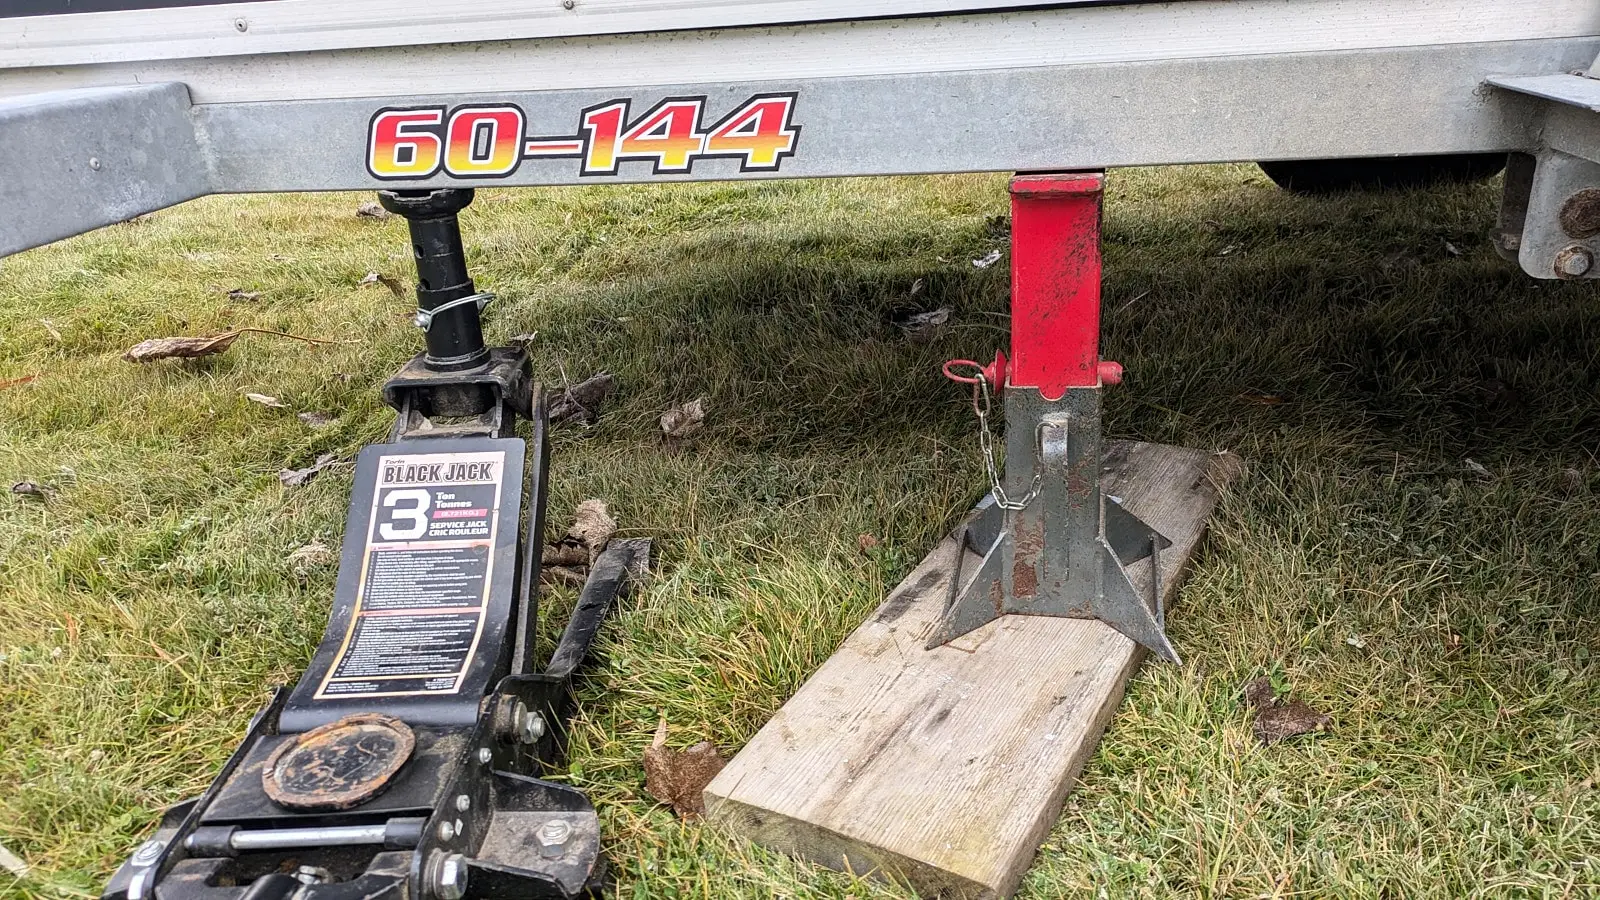
Double Axle (Tandem)
Option A
- Place wheel chocks to prevent the trailer from moving or shifting.
- Use a jack, positioning it as close as possible to the wheel to have solid support on the frame.
- If needed, place wooden blocks under the jack to increase its lifting height.
- Raise the trailer until the wheel is fully off the ground.
Option B
- Place wheel chocks to prevent the trailer from moving or shifting.
- Use a jack and an adapter designed for this purpose. Position it behind the wheel, near the suspension spring’s U-bolts. NEVER LIFT FROM THE CENTRE OF THE AXLE!
- If needed, place wooden blocks under the jack to increase its lifting height.
- Raise the trailer until the wheel is fully off the ground.
Removing the Wheel
Steps
- Once the trailer is raised, finish unscrewing the lug nuts by hand or using your socket.
- If the protective cover is stuck, inspect it for retaining screws.
- Set aside the cover and the lug nuts.
Removing the Bearing
Tools
- Adjustable pliers
- Hammer
- Cold chisel
Steps
- If possible, use adjustable pliers to remove the central protective cap.
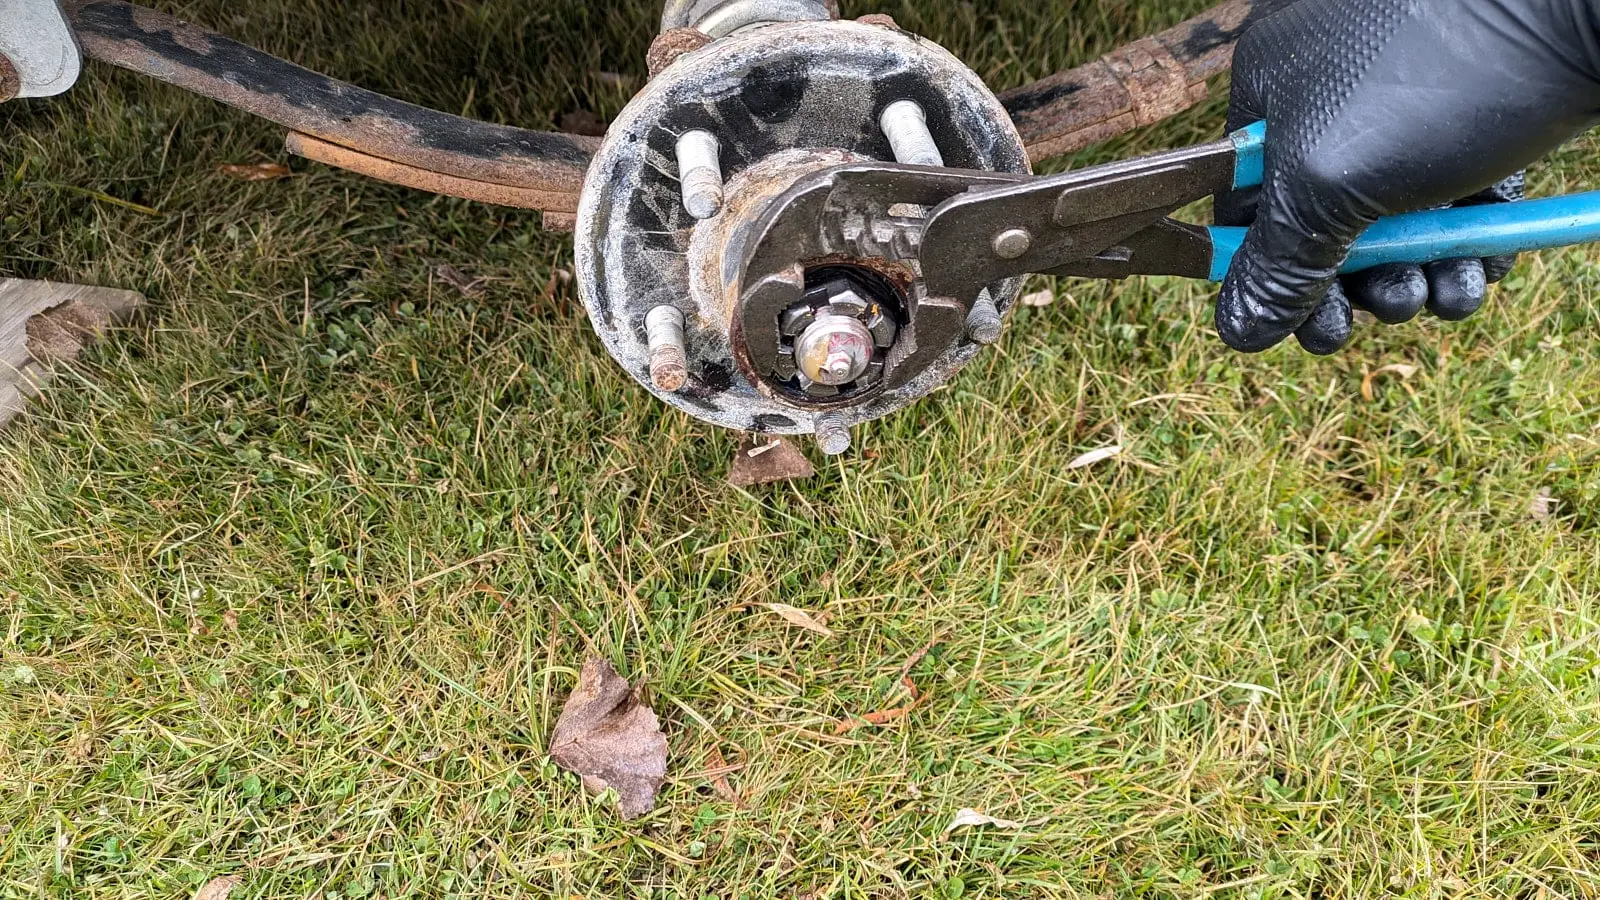
- If the cap is difficult to remove, use a cold chisel and hammer (wear safety goggles). Insert the chisel at the joint between the hub and the cap.
- Gently tap the chisel with the hammer to loosen the cap, then reposition the chisel to the opposite side. Repeat until the cap is completely removed.
- If the cap is damaged, replace it.
- Use pliers to straighten the ends of the cotter pin.
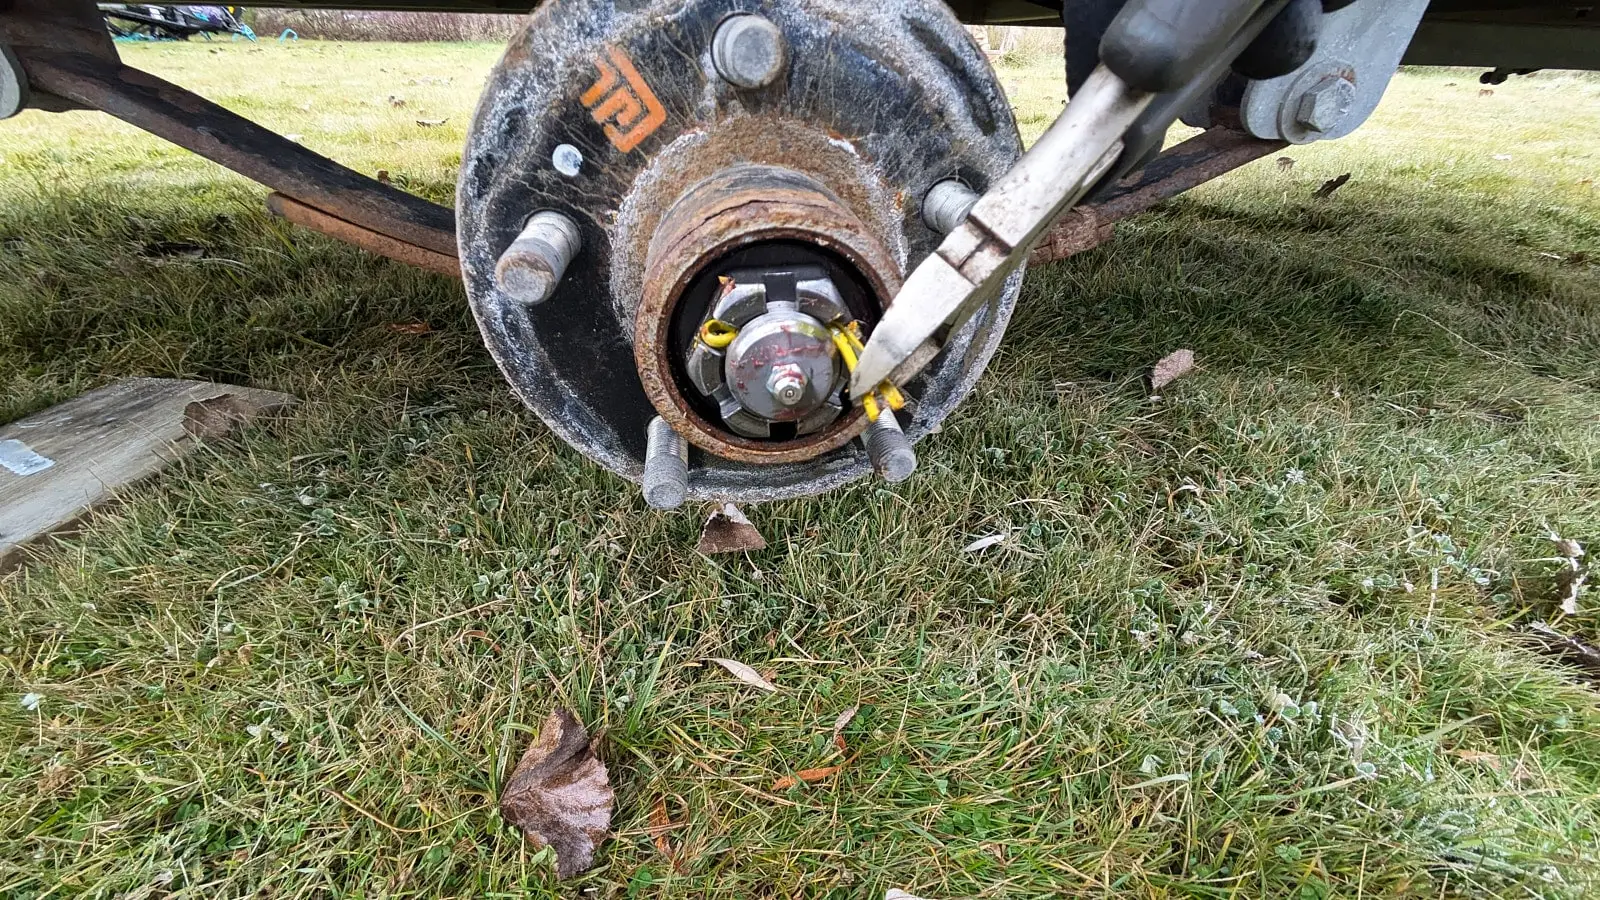
- Slide the cotter pin out and set it aside.
- Use the pliers again to unscrew the central nut.
- Remove the nut and washer and set them aside.
- You can now remove the hub. Be careful, as the bearing facing you might fall out.
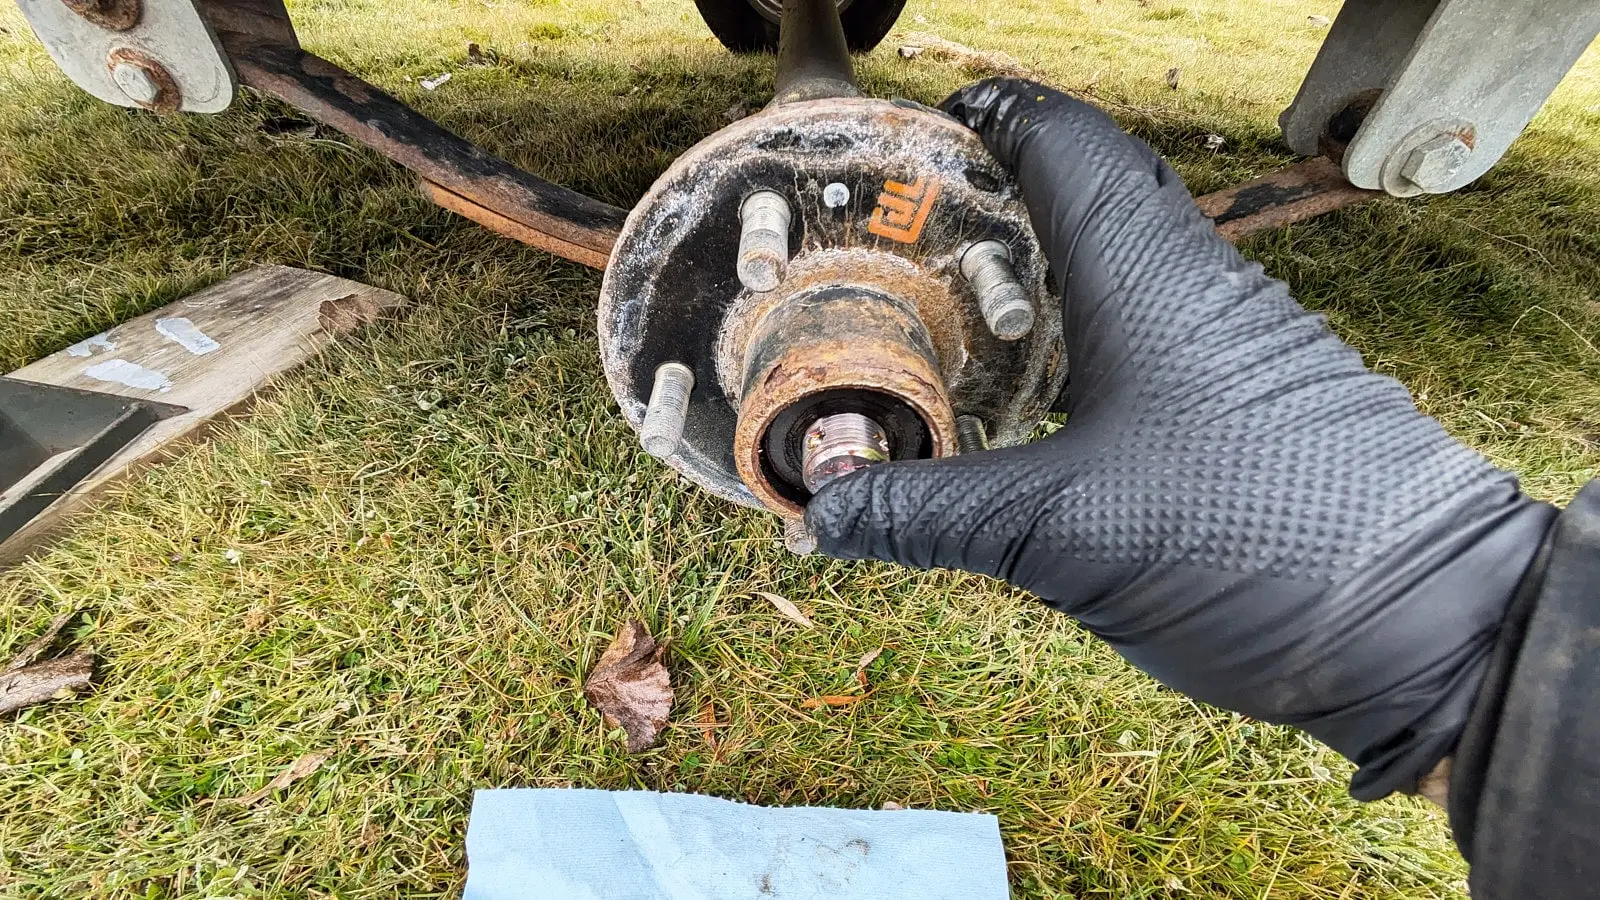
- If needed, use a soft mallet to help loosen the hub.
Inspecting the Bearing
Tools
- Rag
- Protective gloves
- Brake cleaner
Steps
- Once you’ve removed the hub and placed it on a clean surface, begin cleaning and inspecting.
- Use a rag to remove as much grease as possible from the axle.
- Spray brake cleaner on the axle and wipe it clean. The shaft should feel smooth and show no signs of wear.
- Inspect the outer bearing: Use a clean rag to wipe the outside of the bearing to expose the rollers. They should be smooth and free of grooves.
- Typically, there is a seal at the back of the hub, and the second bearing is located behind it.
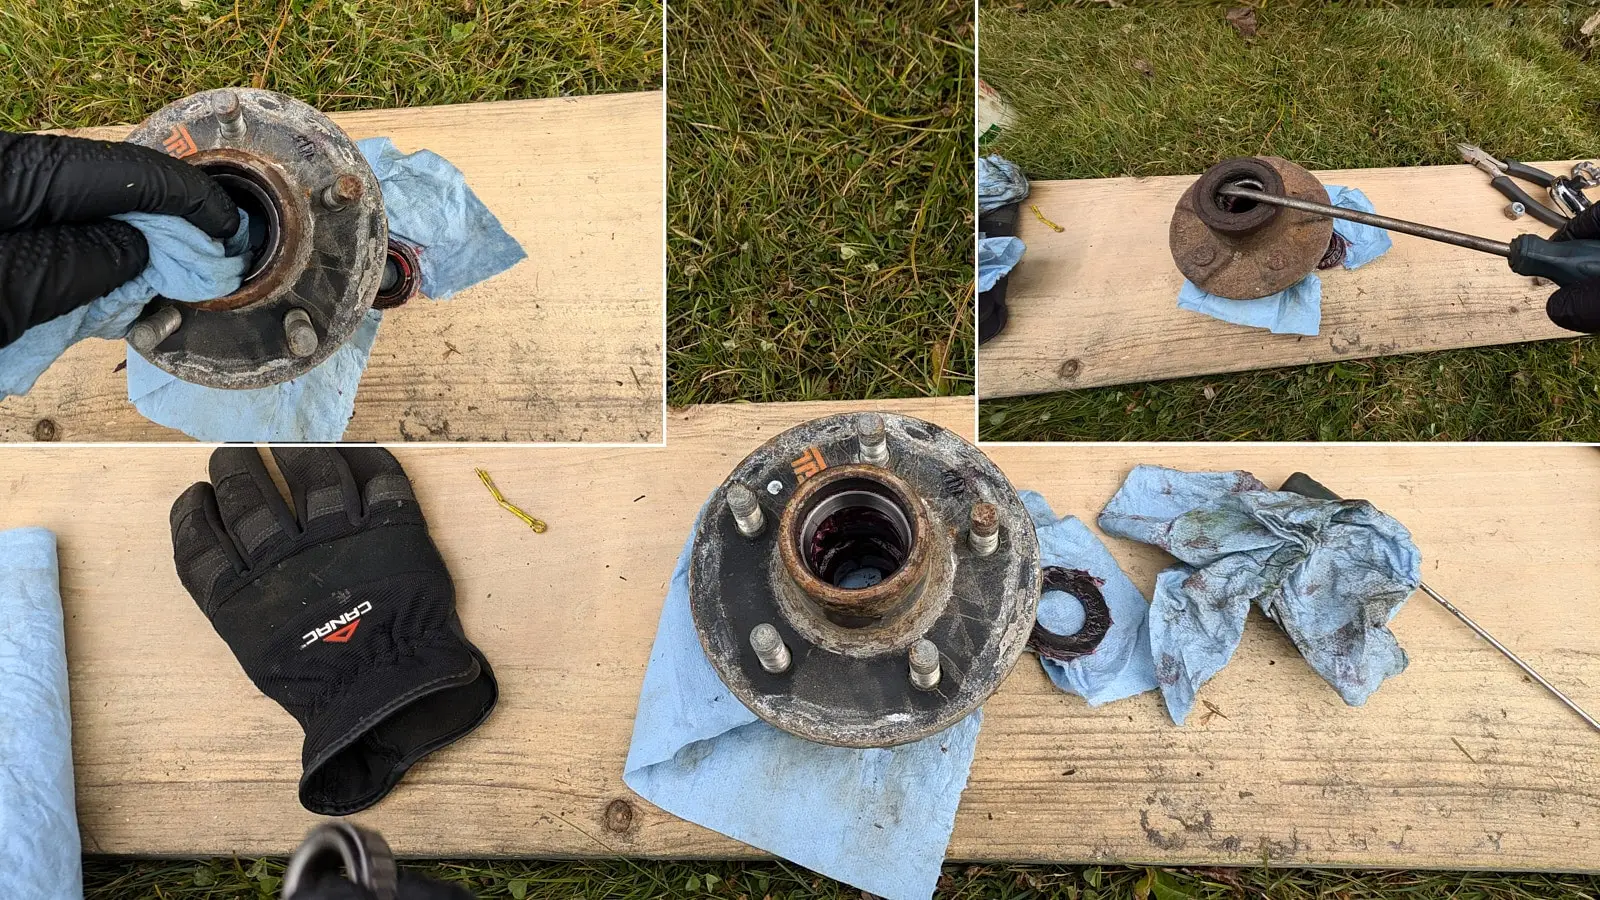
- You can remove the seal to inspect the bearing. Note that the seal will likely need replacement, as it may become damaged during removal. The rollers should also be smooth and groove-free.
- Clean the inside of the hub to inspect the condition of the other part of the bearing (the cage).
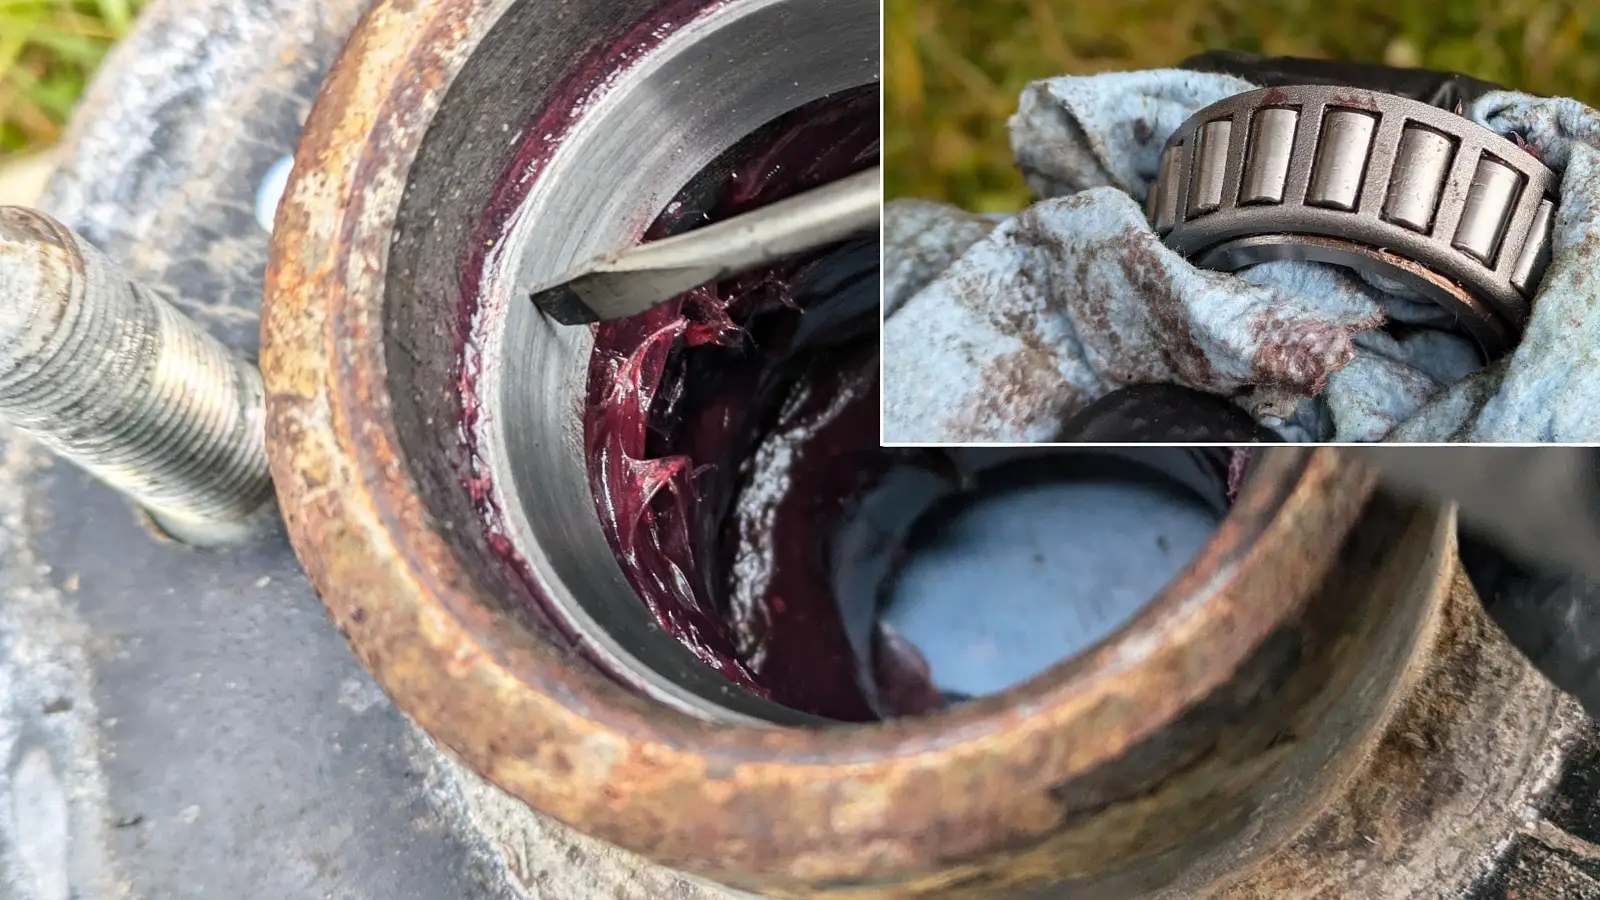
Note: Record or label the position of each bearing. They are not always identical.
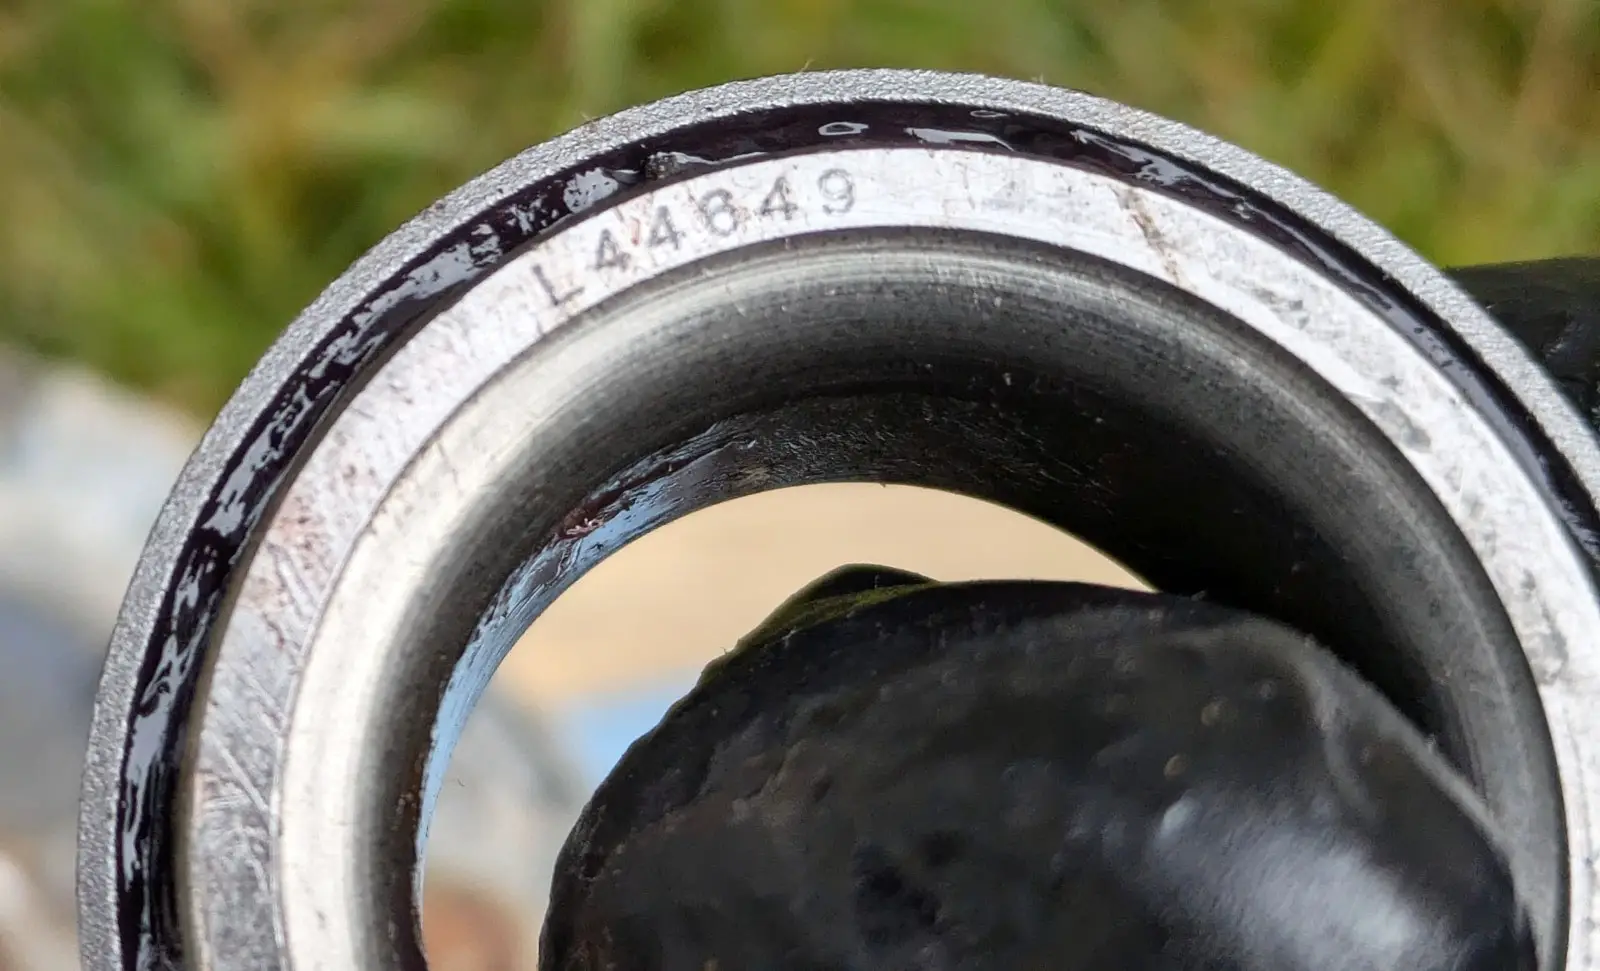
Damaged bearings can be replaced with new ones after some research. Often, the part number is stamped on the side of the bearing. However, replacing the entire hub is often quicker and more cost-effective, giving you all-new components for the season.
Greasing Bearings and Reinstalling the Hub
Tools
- Rag
- Protective gloves
- Bearing grease
- Grease gun
- Adjustable pliers
- Wheel chocks, trailer wheel blocks, wooden blocks, or bricks
- Socket for your trailer’s lug nuts and breaker bar
Axle Without a Grease Fitting
Steps
- Put on protective gloves and place a generous amount of grease in the palm of your hand.
- Using your other hand, press the bearing repeatedly into the grease until it oozes out on all sides.
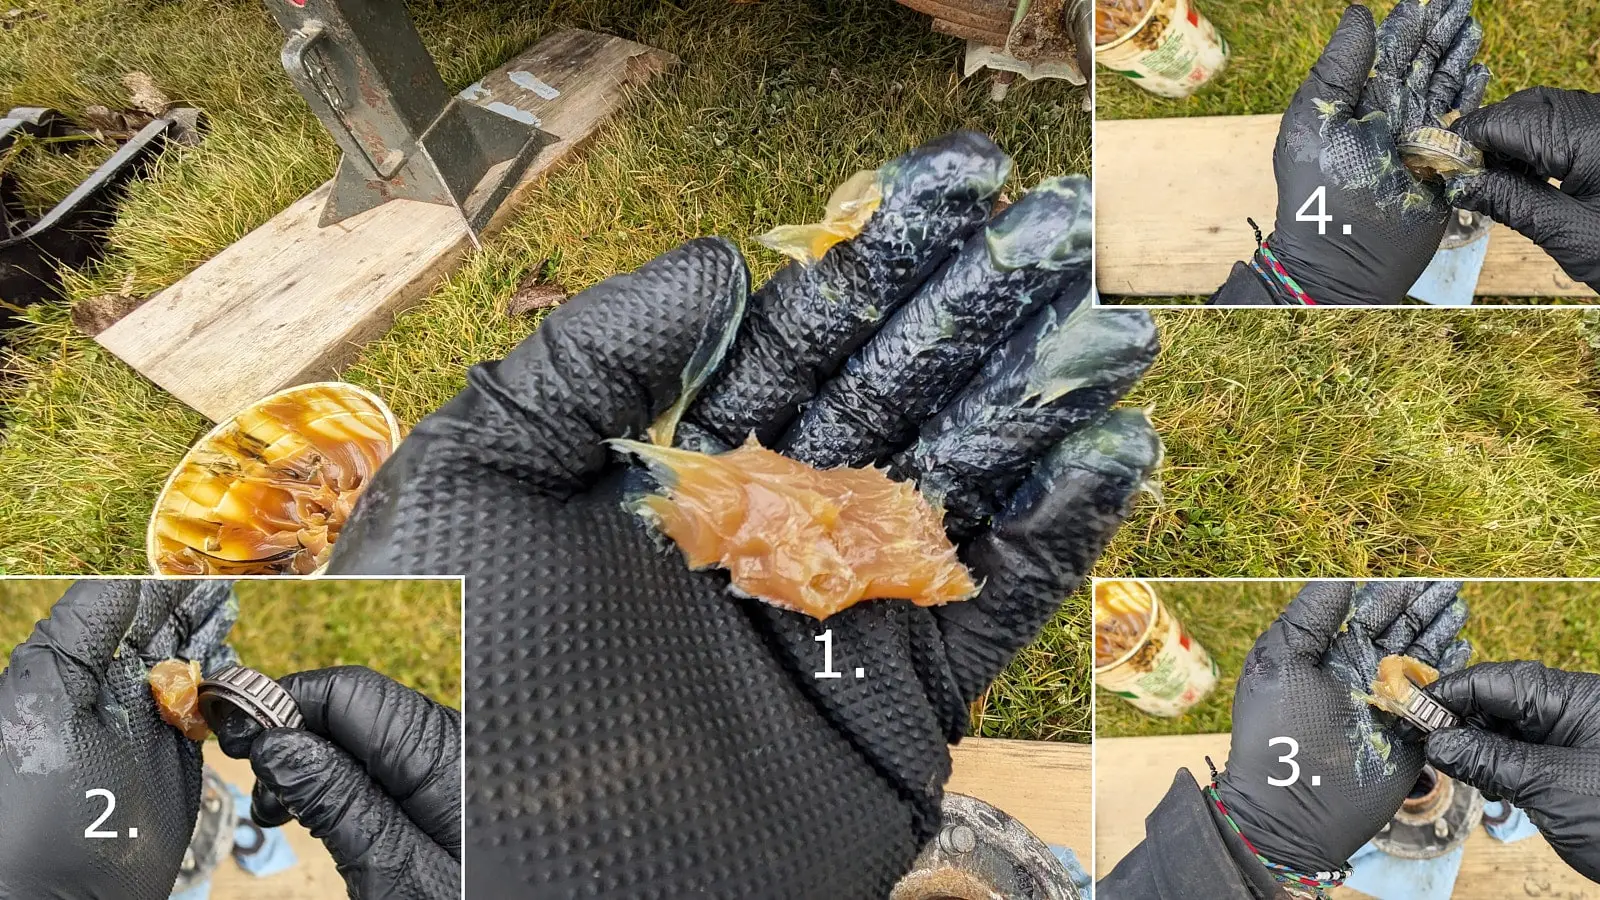
- Repeat this process for each bearing.
- Apply a generous layer of grease to the bearing cage inside the hub. Reinsert the rear bearing.
- Use a large wooden block or a big socket to gently reinstall the seal. This ensures the seal is seated evenly.
- For the front section, apply a generous amount of grease to the bearing cage wall.
- Reinstall the hub and slide it firmly into place. Ensure it is seated fully.
- Using the grease gun, apply grease between the axle and the cage until properly lubricated.
- Once greased, install the bearing, washer, and castle nut.
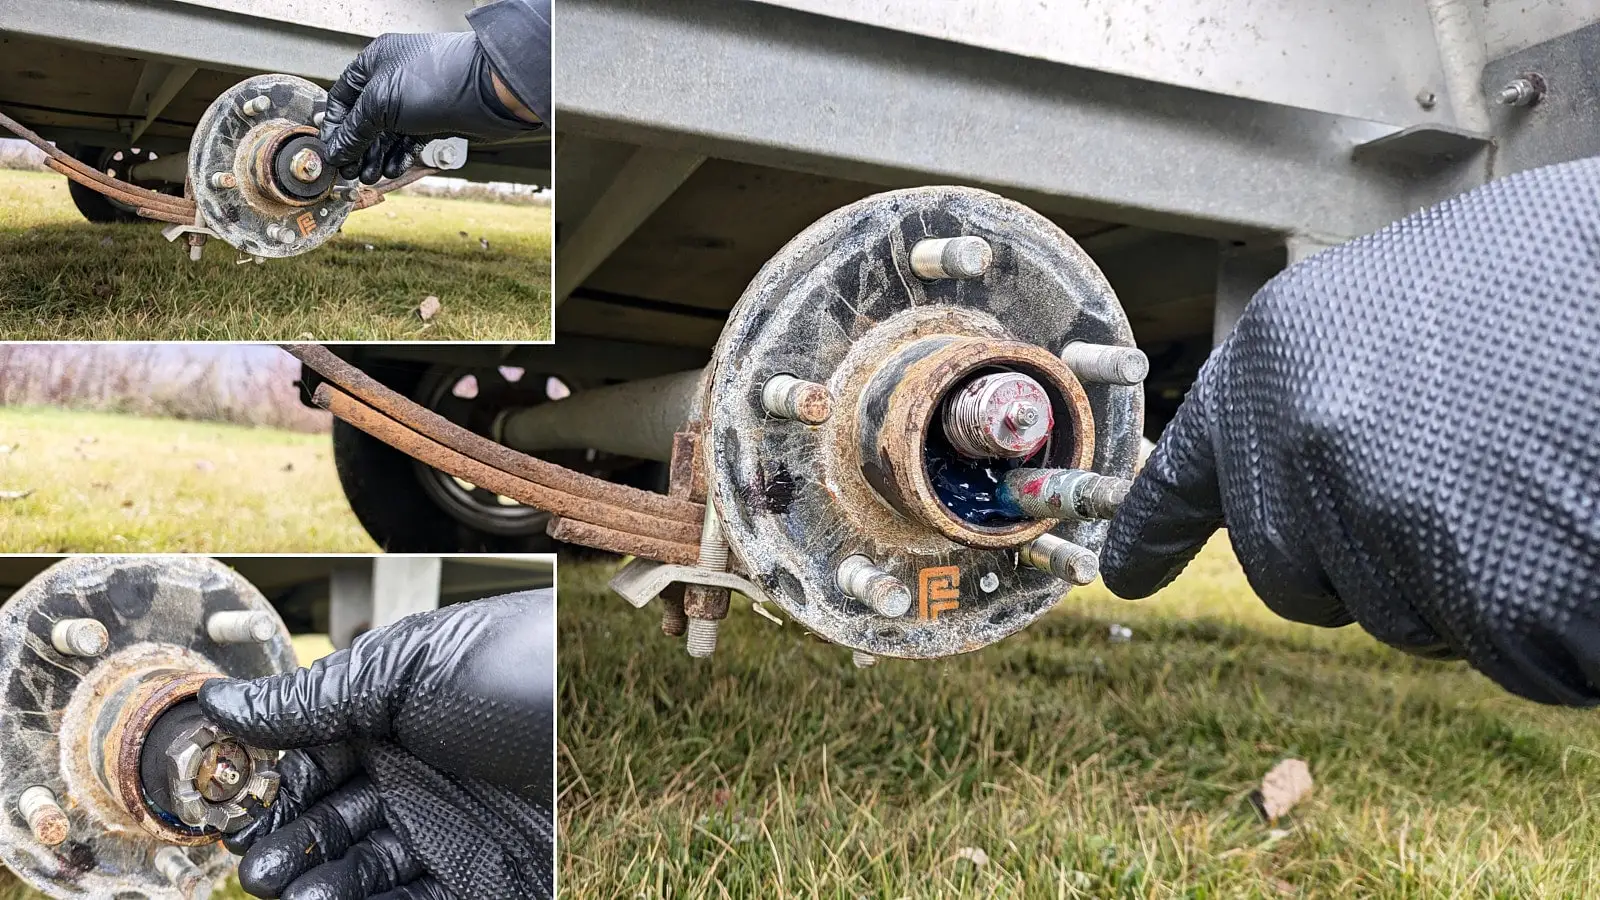
- Use adjustable pliers to tighten the nut. Tighten it until the hub no longer turns, then release the tension. Repeat this 2–3 times to ensure the bearings are properly seated.
- Tighten the nut one final time, then loosen it by a quarter turn, or until the nearest hole in the axle and castle nut aligns. Insert the cotter pin and fold it securely.
- Finally, replace the protective cap, or install a new one if necessary.
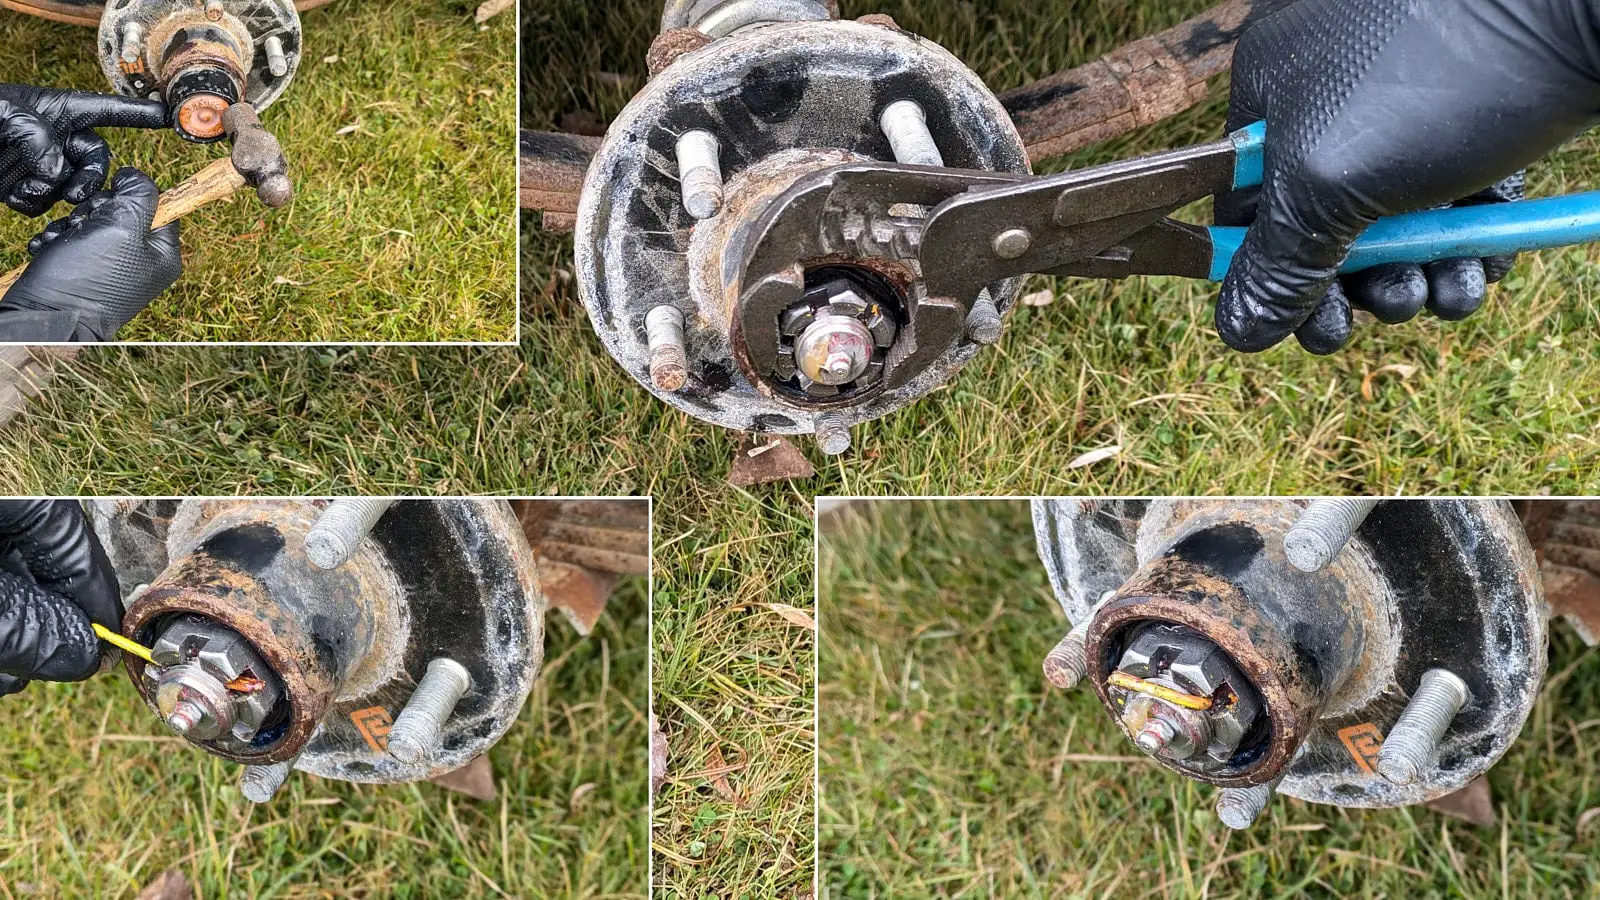
Note: Your hub may have a grease fitting under the cap. If so, use it to add more grease inside the hub until it begins to emerge at the surface.
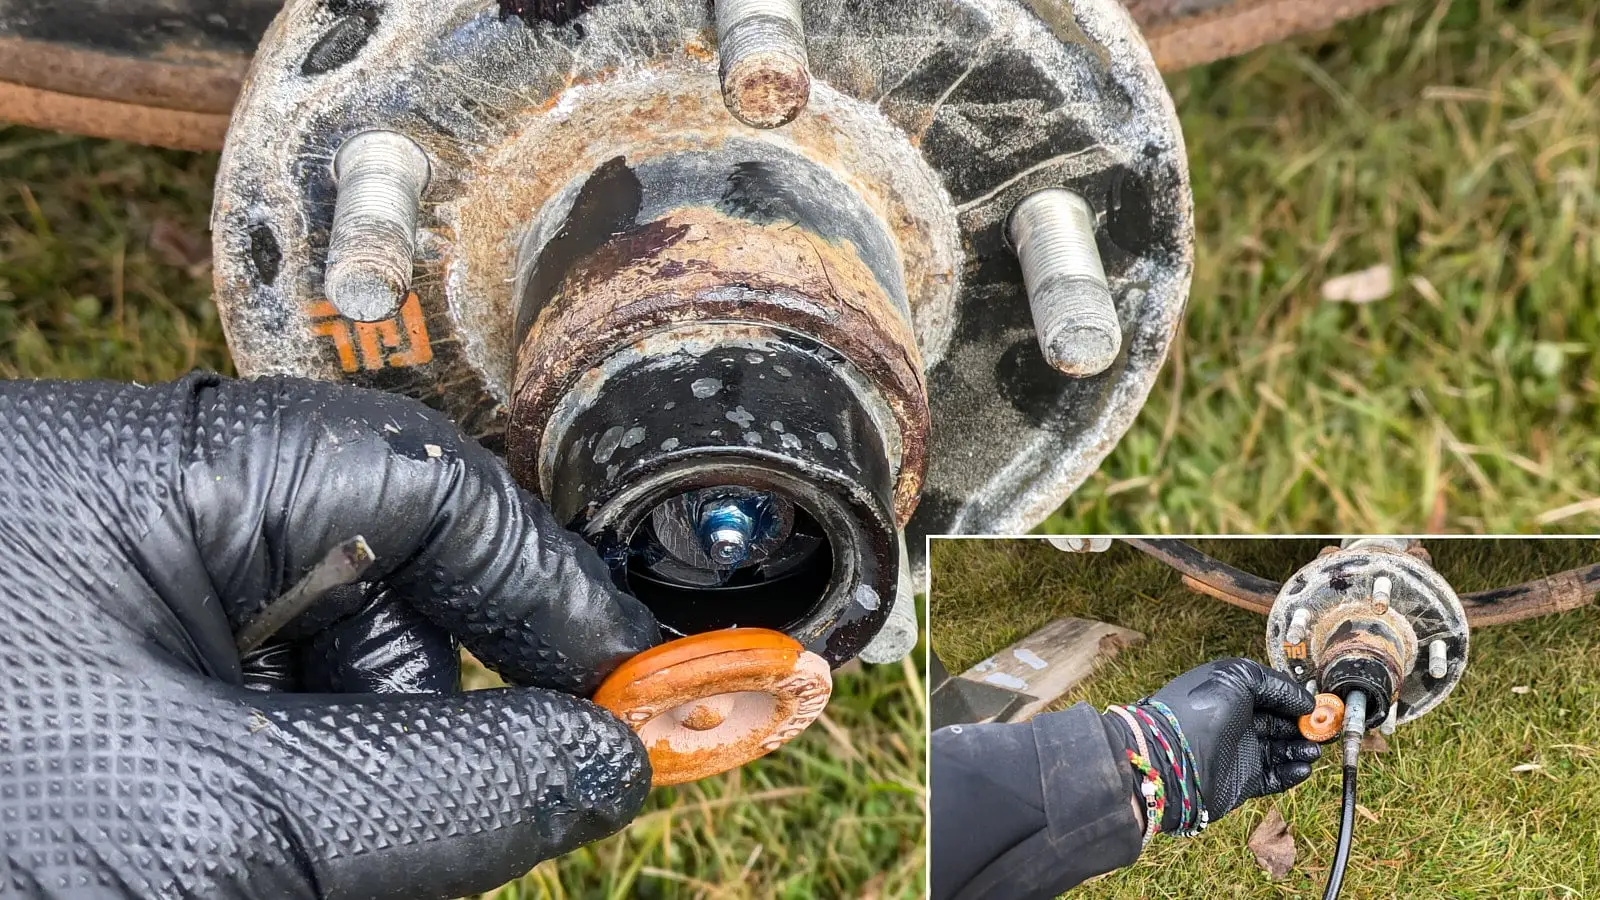
Reinstalling the Wheel and Tightening
- Reinstall the wheel and hand-tighten the lug nuts.
- Lower the trailer to the ground and complete the tightening process.
- Refer to your torque chart for the appropriate torque settings.
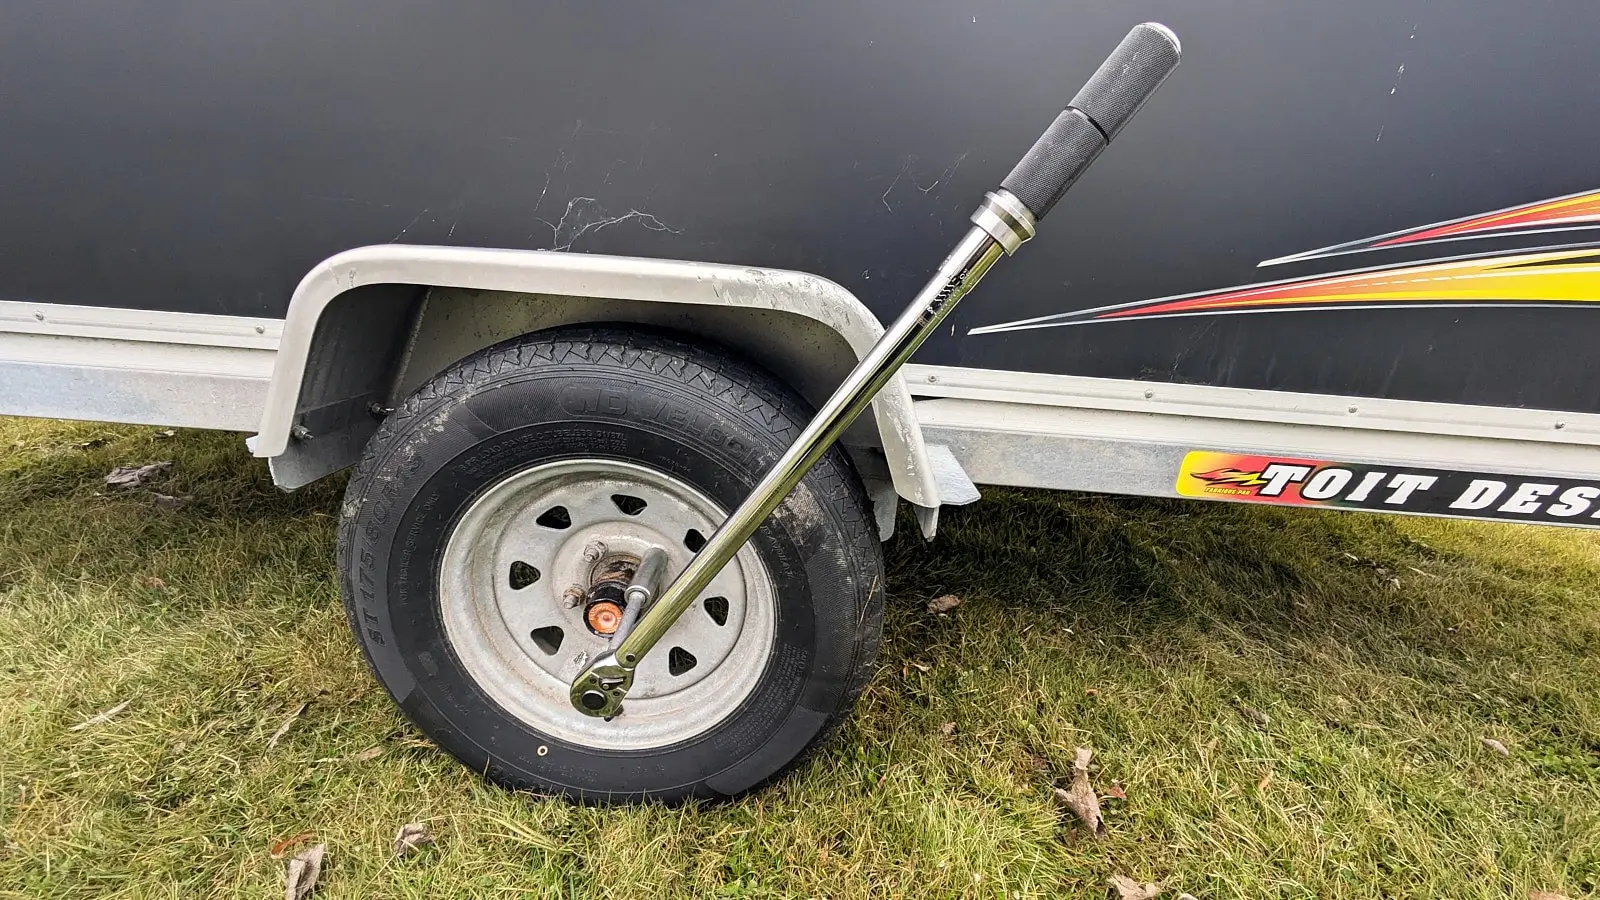
- Repeat these steps for the other side.
- Perform a test drive and recheck the tightness of your wheel bolts for safety.
Tire Inspection
Trailer tires are specifically designed to support precise loads and a prescribed speed limit. Adhering to these specifications ensures optimal safety.
Tools Needed
- Notebook and pencil
- Flashlight (if needed)
Steps
- Check the tire air pressure levels. Inflate the tires as needed (recommended pressure is indicated on the tire’s sidewall).
- If a tire is flat, conduct a visual inspection before inflating:
- Examine the tire for punctures. Look closely for nails or potential debris.
- If no visible damage is found, inflate the tire.
- Apply a dish soap and water solution around the tire.
- Inspect for bubble formations, which indicate leaks. Repair the issue accordingly (e.g., plug the tire, replace the tube, or get a new tire). Always choose the most durable repair option.
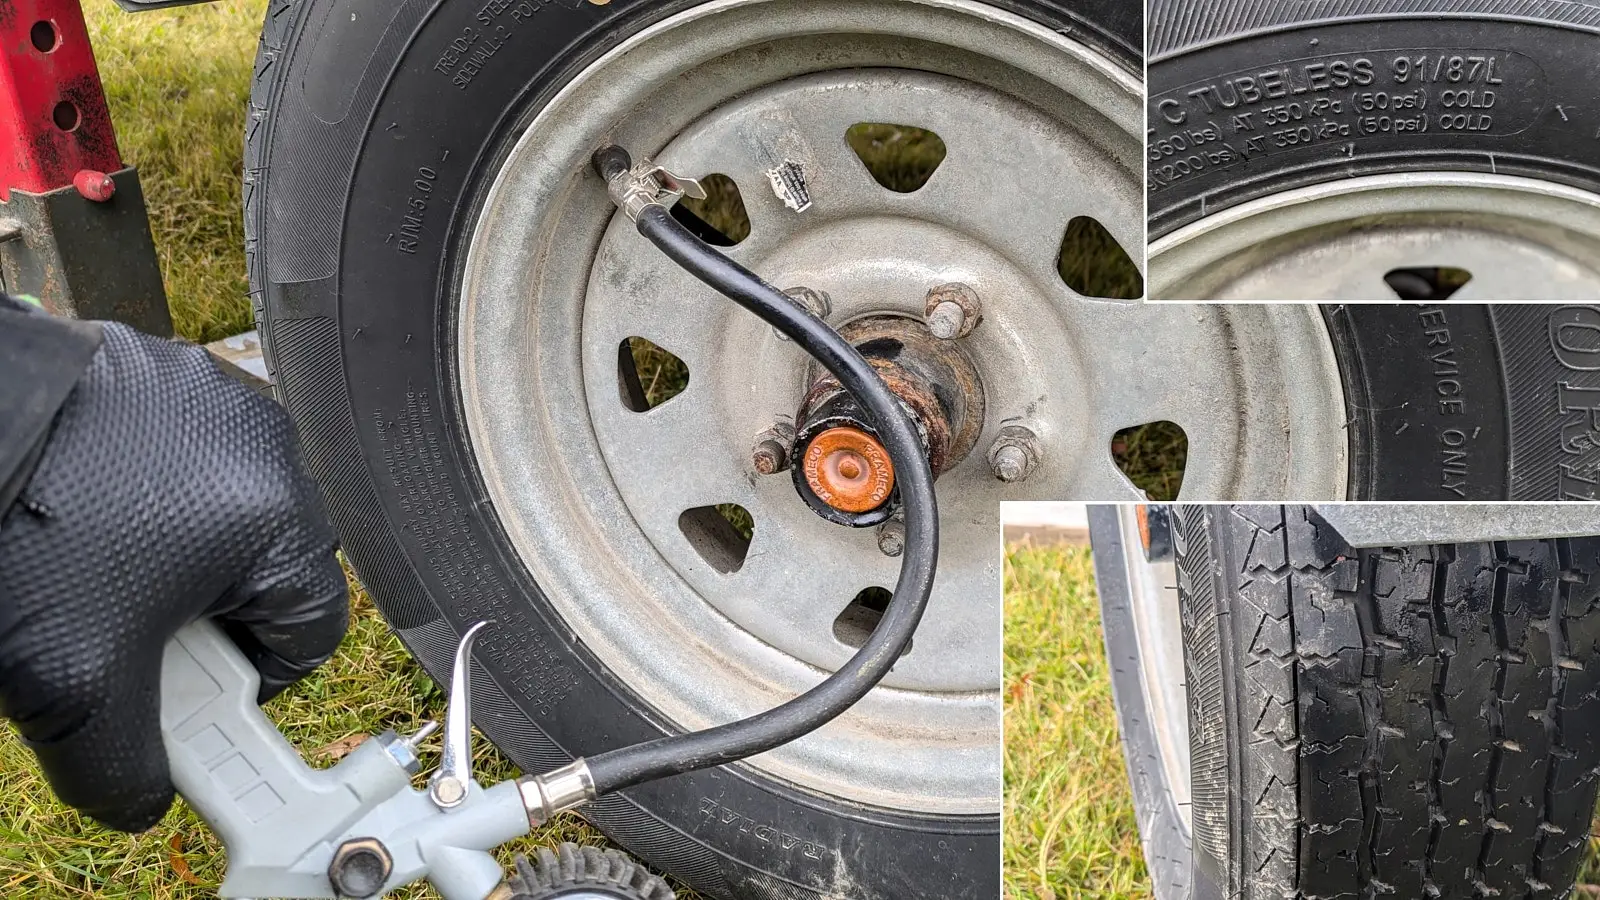
- A good tire should have no cracks, show even wear, and be free of imperfections.
General Trailer Inspection
Performing a visual inspection of your trailer is straightforward. During the off-season—or even during the season—structural components or welds might become damaged.
Tools Needed
- Notebook and pencil
- Flashlight (if needed)
Steps
Inspect the trailer section by section. For example, start with the rear underside or the left side. Create a sketch if needed and take detailed notes.
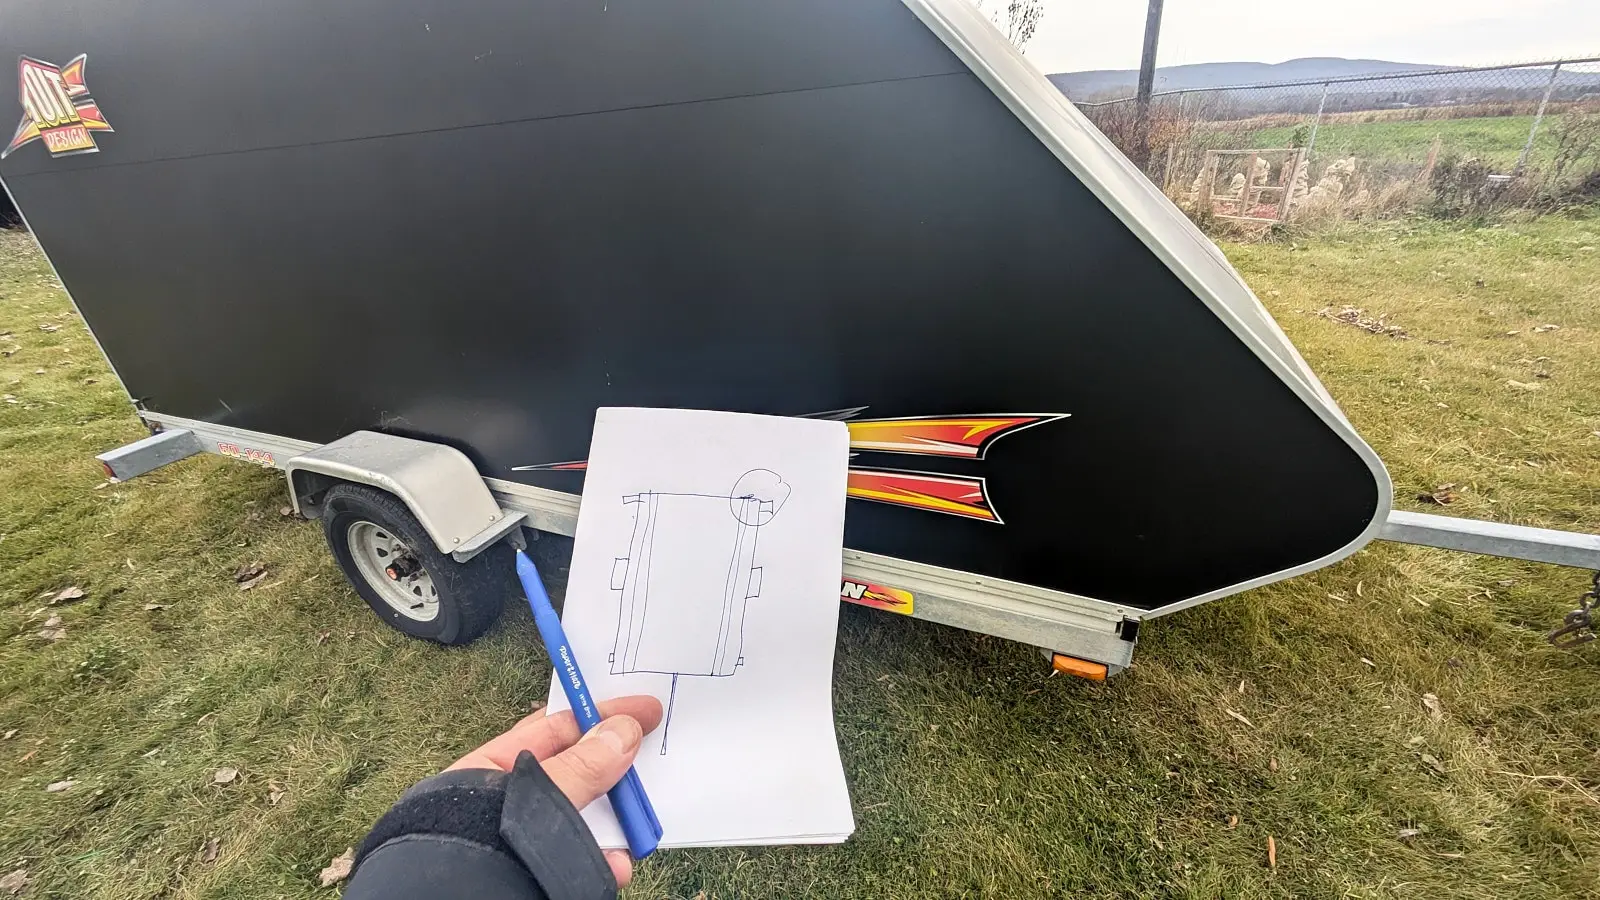
- Inspect the trailer chassis for cracks or excessive rust that could cause perforations.
- Check welds for cracks and make necessary repairs.
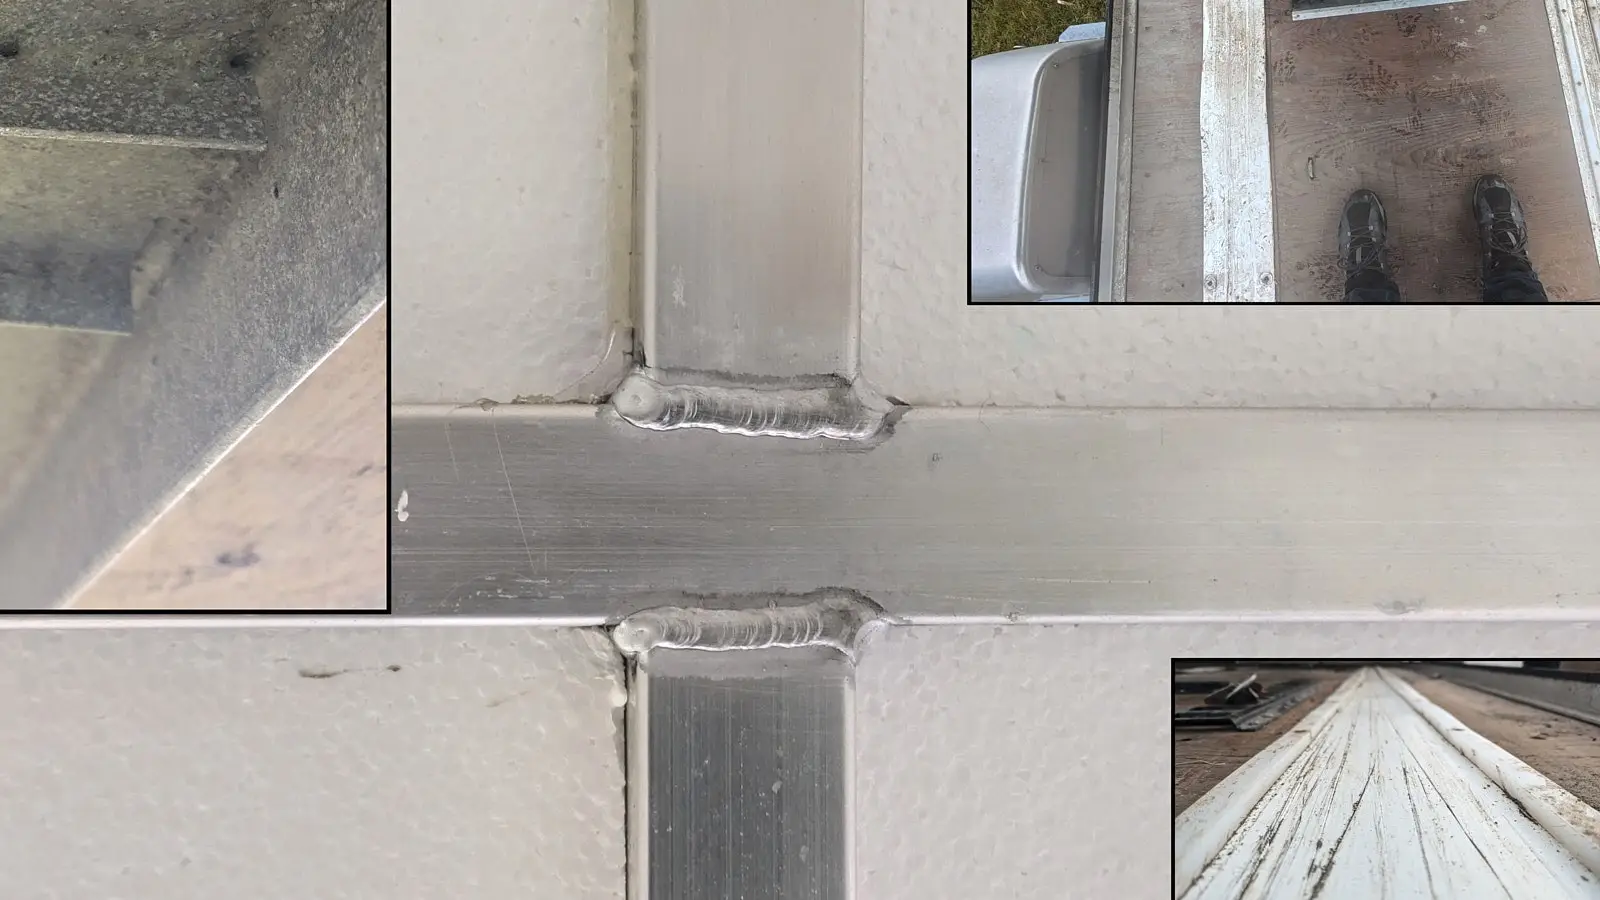
- Ensure the trailer floor is solid and sturdy.
- If the trailer has side panels or door hinges, inspect their integrity, secure attachment, and functionality. Lubricate hinges as needed.
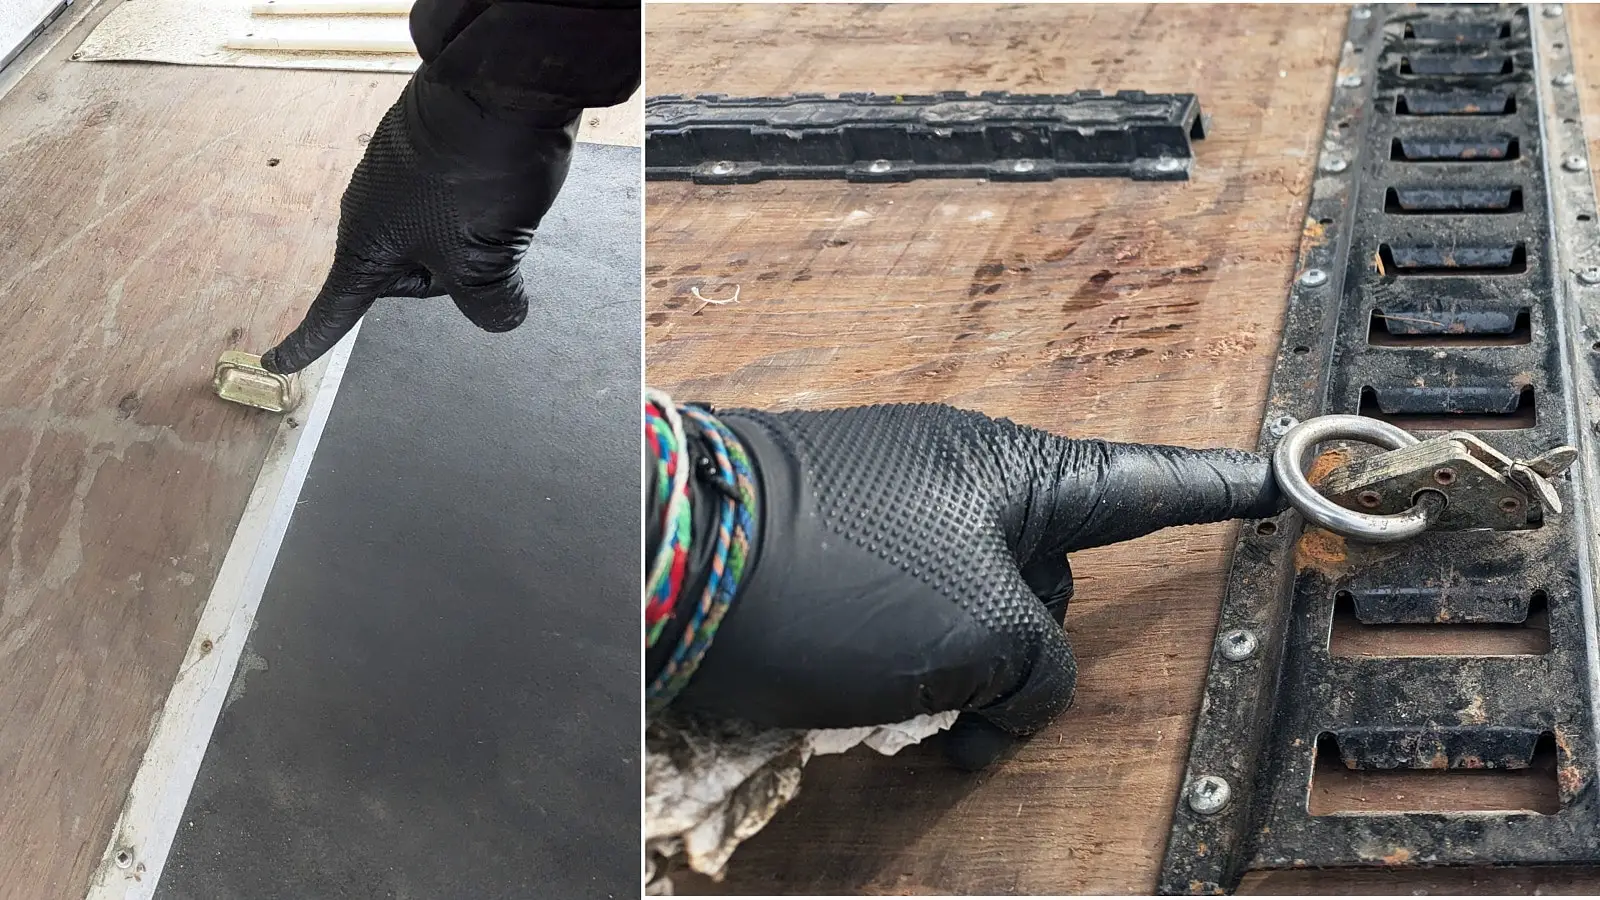
- Check the condition and functionality of all anchor points and tie downs.
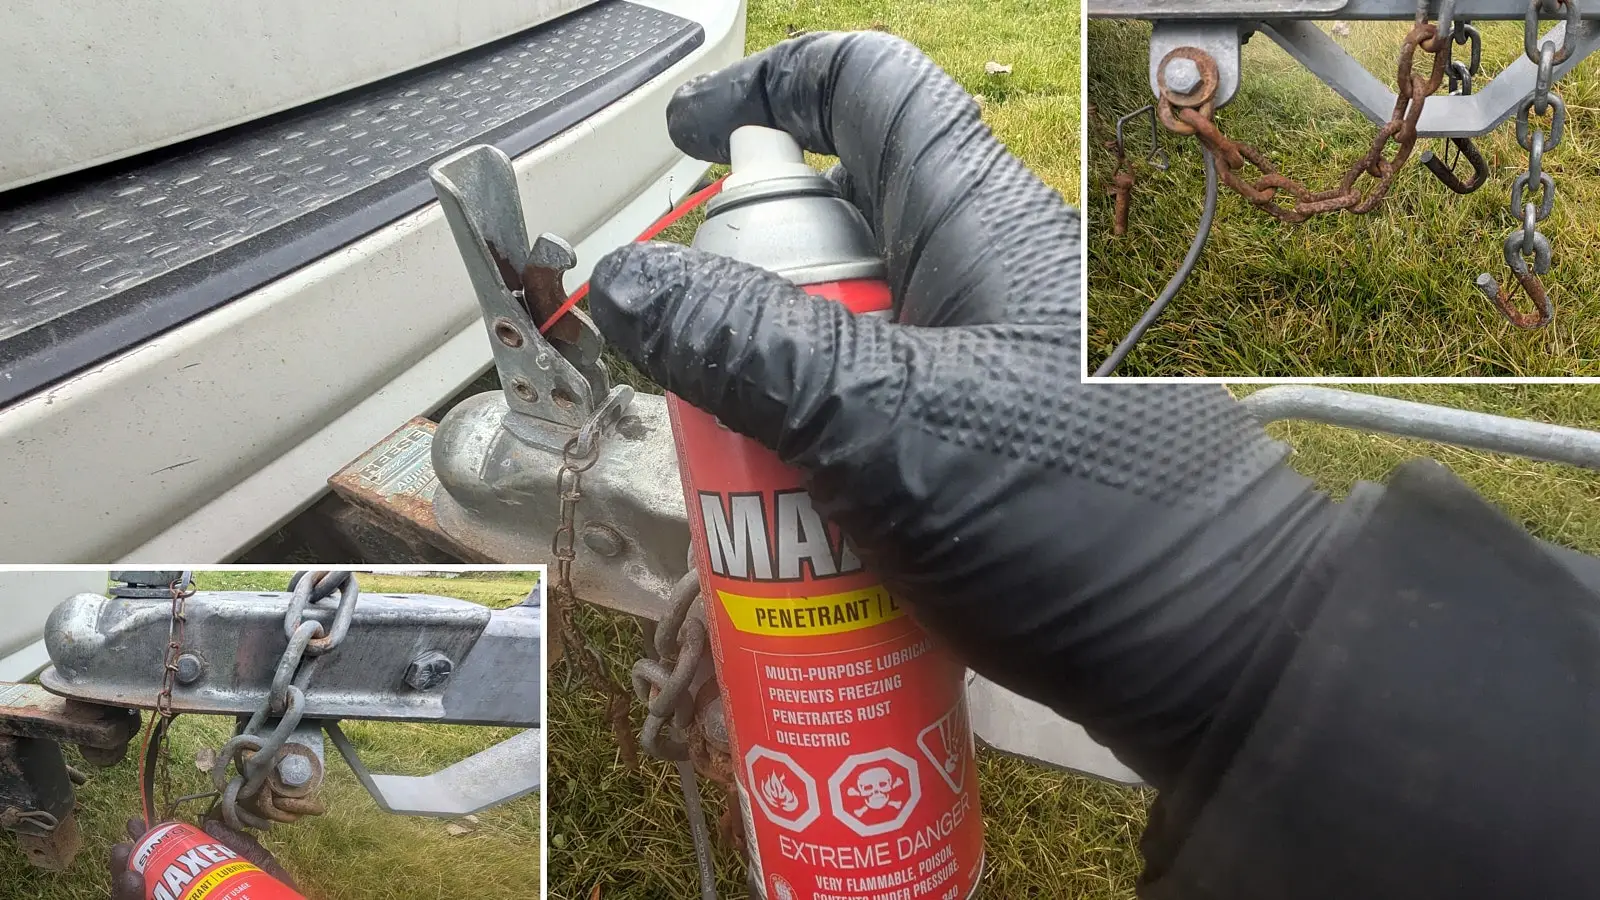
- Finally, ensure the trailer hitch is in good condition and all attachments are sturdy and well lubricated.
Suspension Inspection
Most trailers feature leaf spring suspension, known for its durability and efficiency. However, years of use, rust, and road debris can cause premature wear.
Tools Needed
- Protective gloves
- Grease gun
- Pry bar or large crowbar
Key Inspection Points
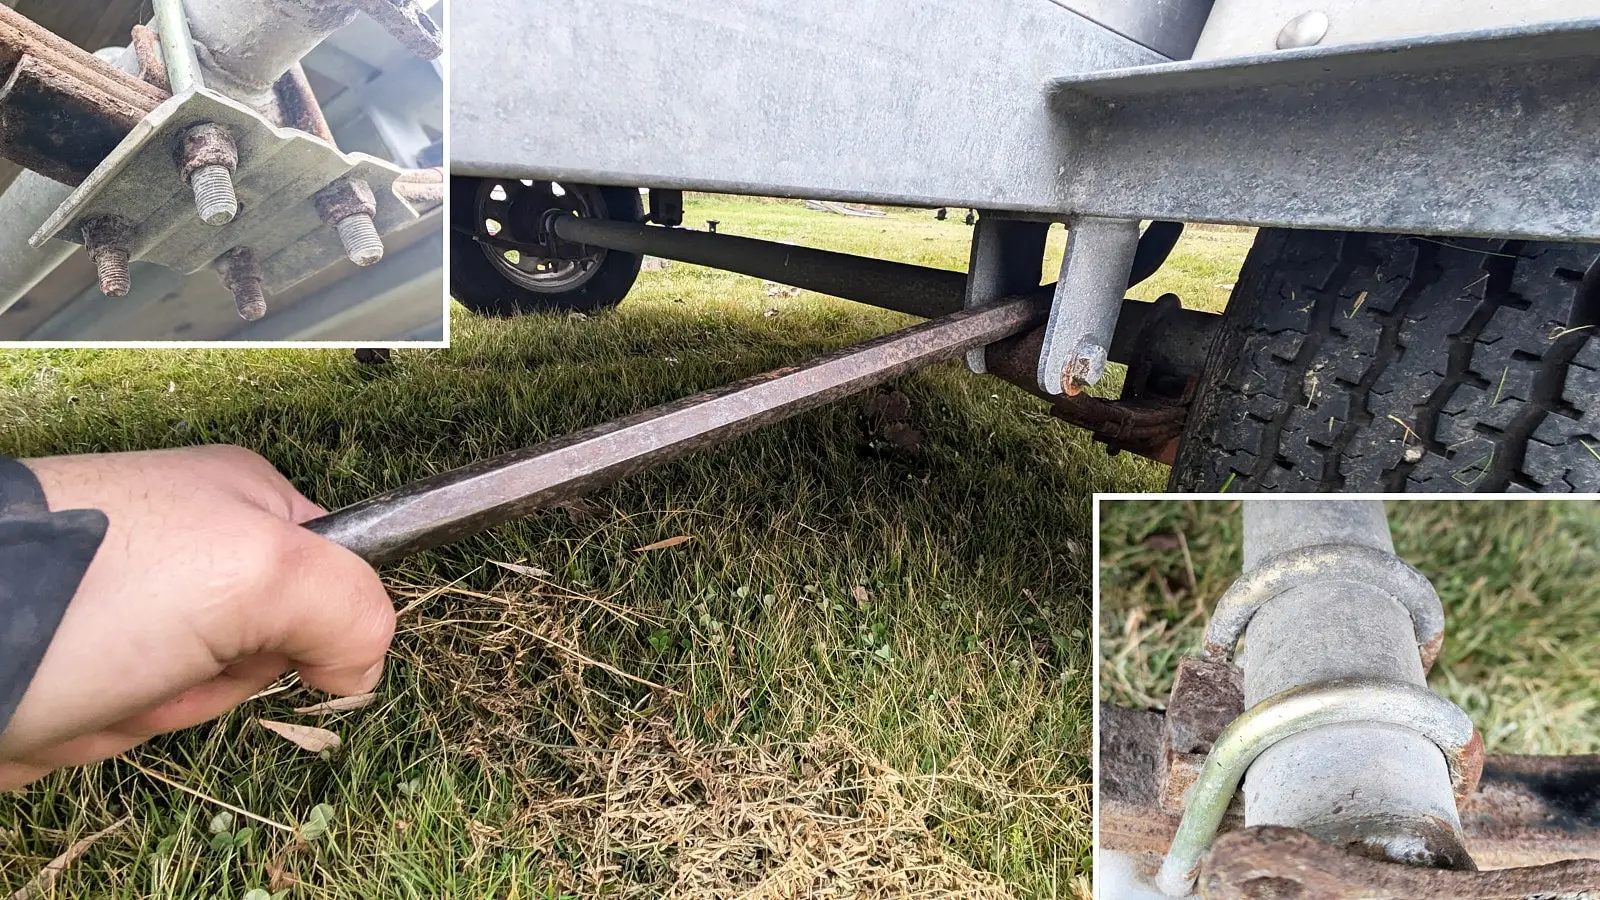
- Examine the U-bolts for rust or damage.
- Check the leaf springs for cracks or breaks. Focus on key areas, such as between the two U-bolts and at each end. Springs should have a curve; if flat or asymmetrical, replace them.
- Inspect the bushings at each bolt for wear. Use a pry bar or crowbar to apply pressure to the spring ends—minimal play is acceptable.
- For tandem axles, inspect the central section for cracks or excessive play in the bushings or bolts.
- Lubricate all available grease points with high-quality grease.
Lights and Electrical System
Your trailer must have functional positioning lights, brake lights, turn signals, and licence plate illumination. Follow these steps for a proper check.
Tools Needed
- Soldering iron
- Multimeter or light tester
- Electrical wires
- Dielectric grease
- Heat-shrink tubing
- Fuse
Checking the Lights
Steps
- Connect your trailer to your vehicle.
- Turn on your vehicle’s daytime running lights; the trailer lights should activate simultaneously.
- Activate the hazard lights to simulate the turn signals.
- For brake lights, either ask someone to assist or position the trailer near a wall and apply the brakes.
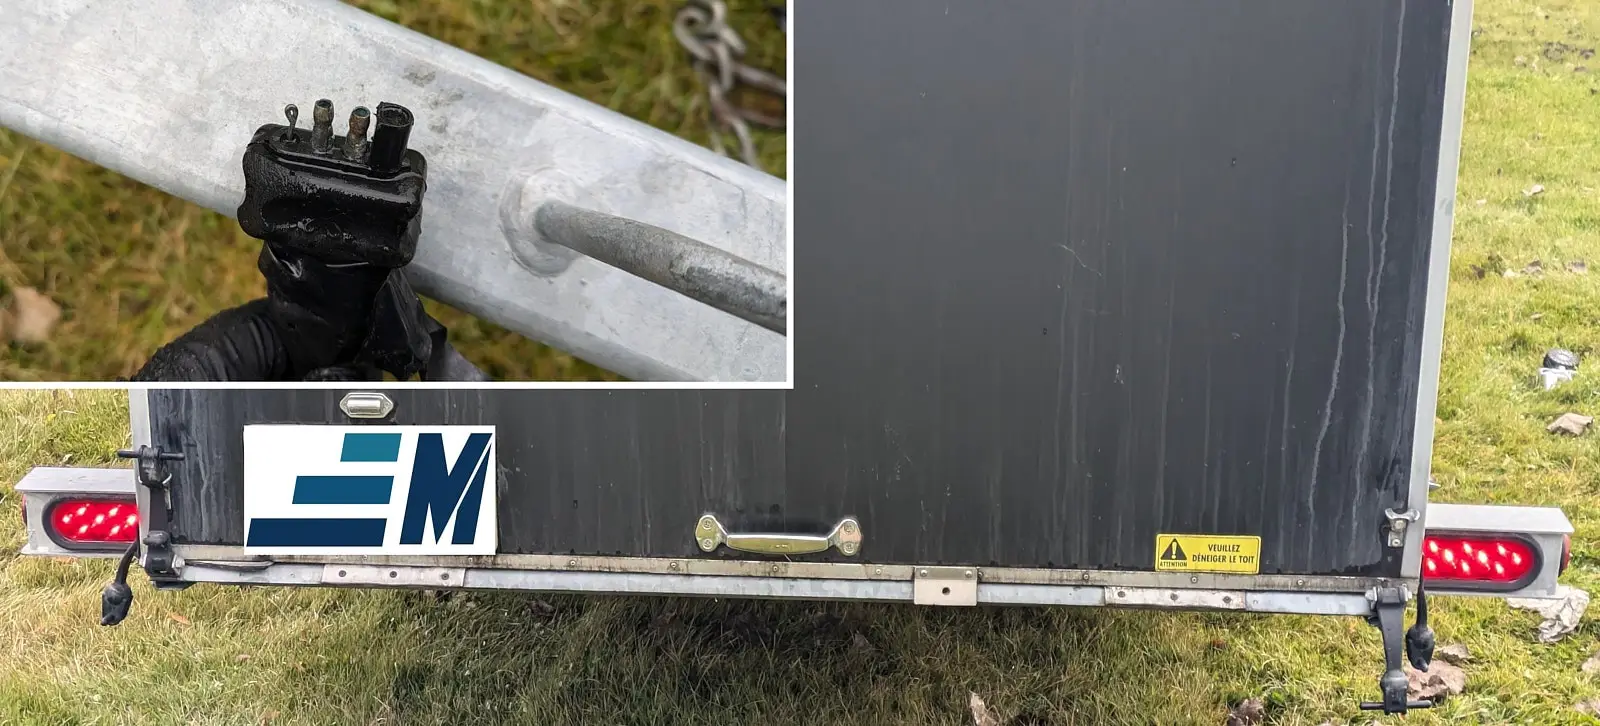
Troubleshooting Non-Functional Lights or Accessories
- Potential issues include a blown fuse, or a wire damaged by corrosion.
- Replace any burnt or damaged bulbs or lights.
If the issue persists after replacing components:
- Locate the fuse box, either on the trailer or vehicle, and inspect its condition.
- Use a voltmeter or light tester to trace the faulty wire.
- Never puncture the trailer’s wires with testing probes; this can allow corrosion to enter, leading to rapid wire deterioration.
- Once the issue is identified, perform a repair that will last. Avoid quick fixes like splicing wires unless absolutely necessary.
- If you do choose to splice, solder the wires, apply dielectric grease to the joint, and seal with heat-shrink tubing instead of electrical tape.
For trailers equipped with auxiliary brakes, it is recommended to consult a trailer specialist for maintenance as a safety precaution.
The Importance of Trailer Maintenance for Hassle-Free Trips
In conclusion, proper trailer maintenance ensures its safety and longevity. By following this guide, you can prevent breakdowns and potential issues. Always work safely and know your limits. With regular and detailed maintenance, you’ll enjoy worry-free adventures.
Keep Reading
InfoQuad Mechanics: Alignment of Wheels on Your ATV at Home

