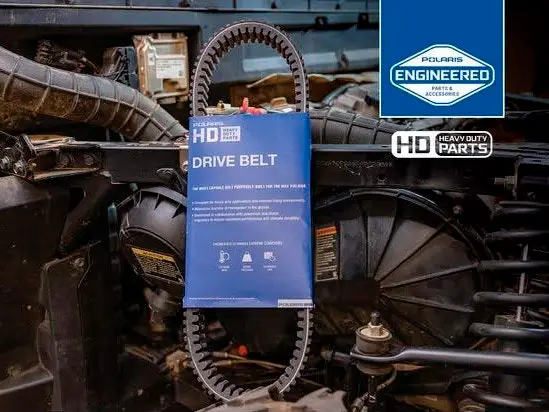
If your ATV is equipped with a CVT (Continuously Variable Transmission), it is fitted with a drive belt. There are many reasons to replace your belt, including wear, breakage and/or moisture.
This article covers belt replacement for Polaris ATVs. The principle of belt replacement will be similar from one brand to another. Throughout this column, I’ll guide you step-by-step, including details and images.
An important thing to remember: work safely and know your limits.
Level of difficulty: easy to moderate.
Tools Required :
- Pliers (supplied in Polaris tool kit).
- Torx “L” wrench (supplied in Polaris tool kit).
- Threaded “L” wrench for opening secondary pulley (supplied in Polaris tool kit).
- Ratchet wrench.
- A 4 or 6-inch extension lead.
- 10 mm and 12 mm sockets.
- Flat screwdriver.
- Floor jack and candles.
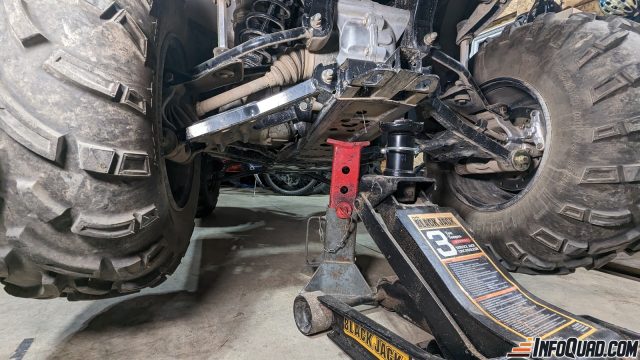
#1: Lift and Secure the Vehicle
Tools required :
- Floor jack and candles.
Steps :
- Raise the rear of the ATV so that the wheels can clear the ground.
- Secure the ATV’s position by placing a stanchion under the vehicle.
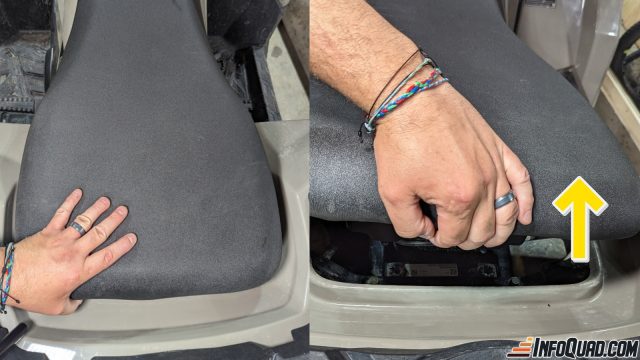
#2: Bench Removal
Steps :
- Using your hand, firmly grasp the back of the bench, and with a sharp tug, pull it upwards.
- Check that no debris falls into the air intake.
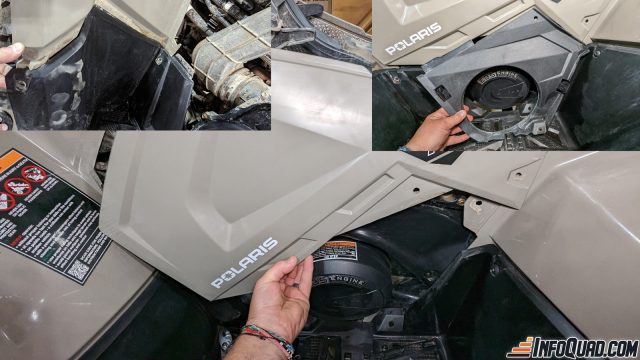
#3: Remove The Protective Panels: LEFT SIDE
Tools required :
- Pliers (supplied in Polaris tool kit).
- Torx “L” wrench (supplied in Polaris tool kit).
- 10 mm socket, extension and ratchet.
Steps :
- Use the pliers supplied in the Polaris kit to remove the plastic pins. This will release both side panels.
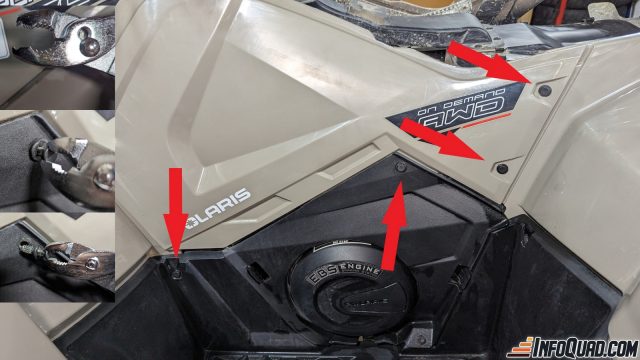
- Using an L-shaped wrench with a Torx tip, unscrew the bolts holding the bottom of the fenders to the rest of the body.

- You’ll need additional bolts on each side of the running board. For this task, you’ll need the Ratchet wrench and a 10 mm socket.
- Remove the panels and set them aside, together with the screws and plastic pins.
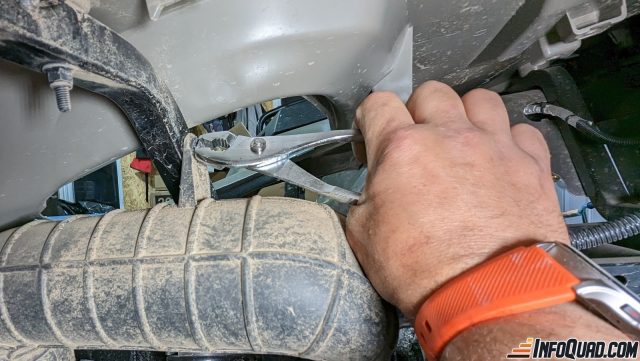
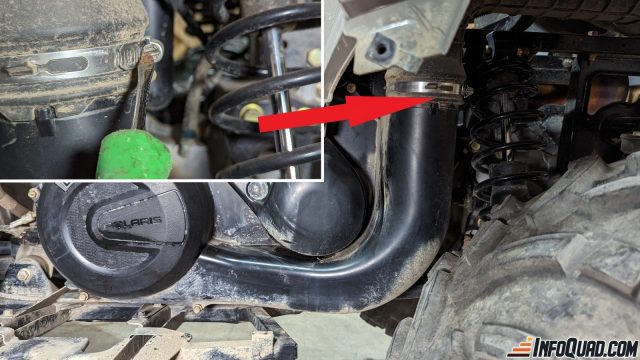
# 4: Release the Belt Housing Ventilation Clip.
2 possible options
Option 1: Remove anchor with plastic pin
Tools required :
- Pliers (supplied in Polaris tool kit).
- Under the left rear fender, locate the belt housing the air outlet.
- Use the pliers to remove the retaining pin, freeing the pipe.
Option 2: Uncouple the air duct
Tools required :
- Flat screwdriver
Steps :
- Under the left rear fender, locate the belt housing the air outlet.
- Using a flathead screwdriver, unscrew the retaining collar and separate the air hoses.
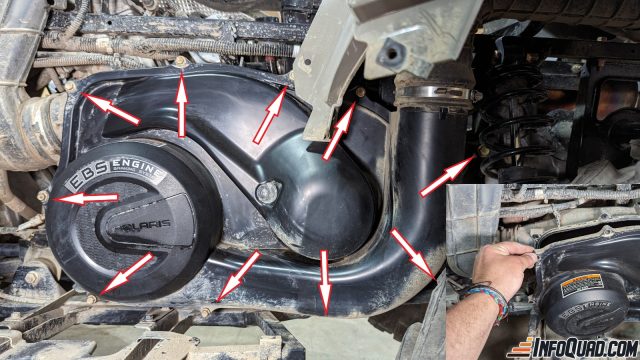
# 5: Remove the Belt Access Cover.
Tools required :
- 10 mm socket, extension and ratchet.
Steps :
- Remove the bolts around the cover.
- Grip each end of the lid, apply a little tension and the lid will come off.
- Remove the cover and set it aside with the bolts.
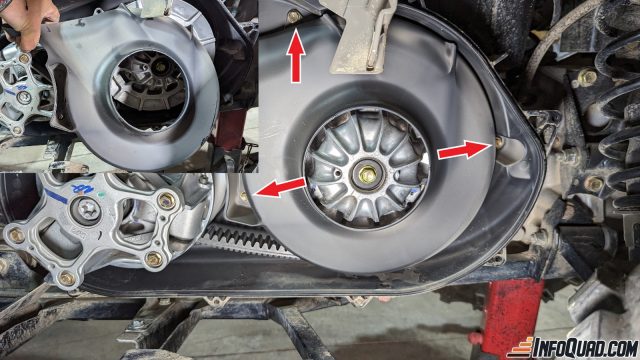
# 6: Remove the Belt Guard.
Tools required :
- 10 mm socket, extension and ratchet.
Steps :
- Locate the guard retaining bolts and unscrew them.
- Remove the guard and set it aside with the bolts.
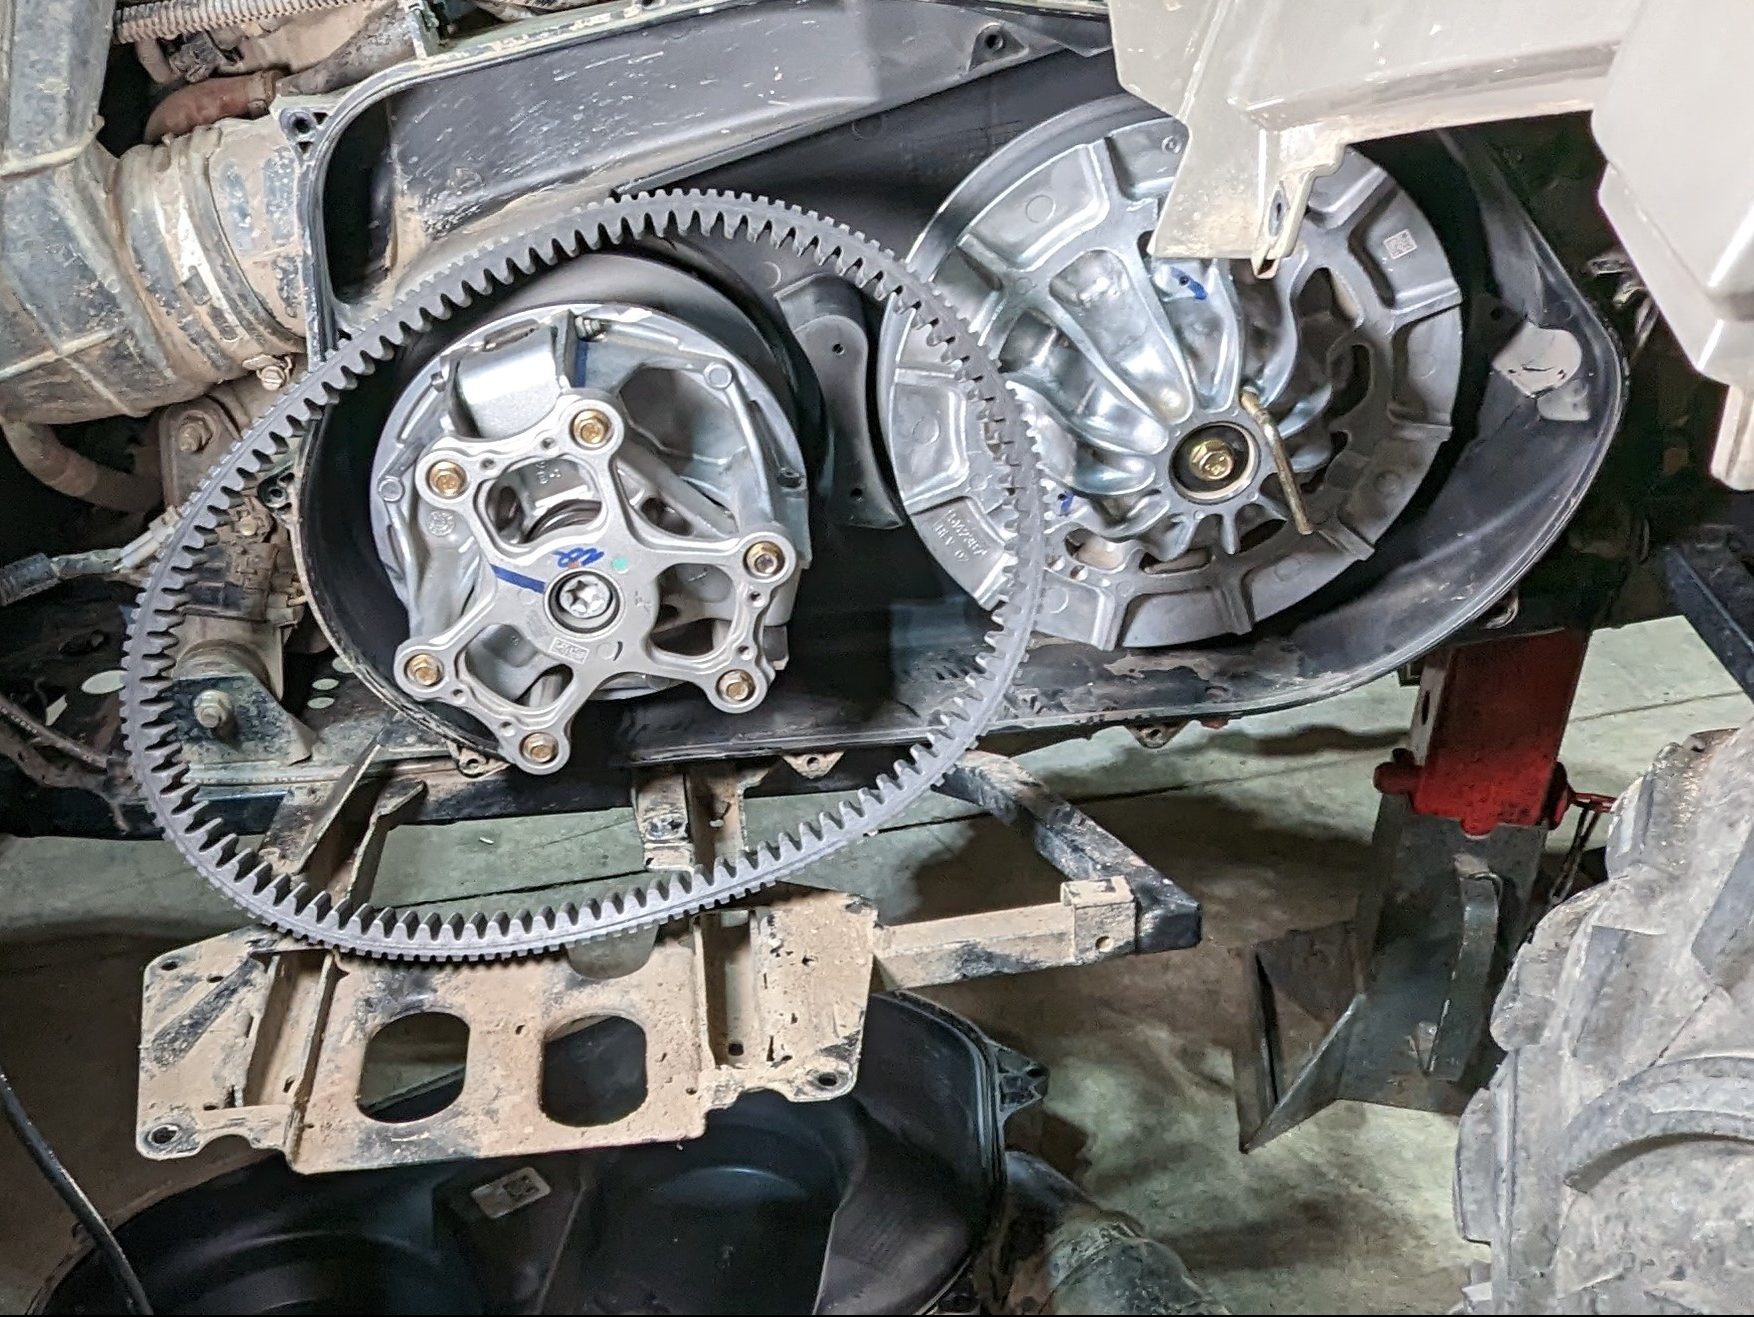
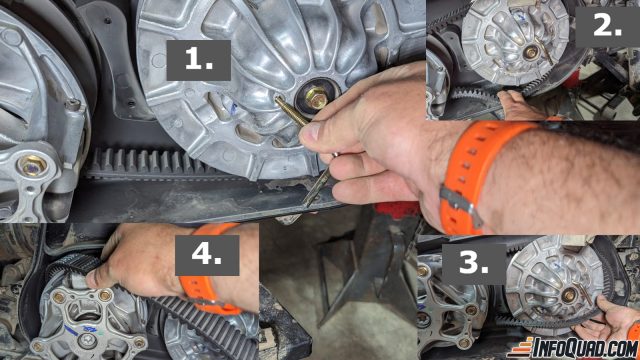
# 6: Removing the Belt.
Tools required :
- Threaded “L” wrench for opening secondary pulley (supplied in Polaris tool kit).
Steps :
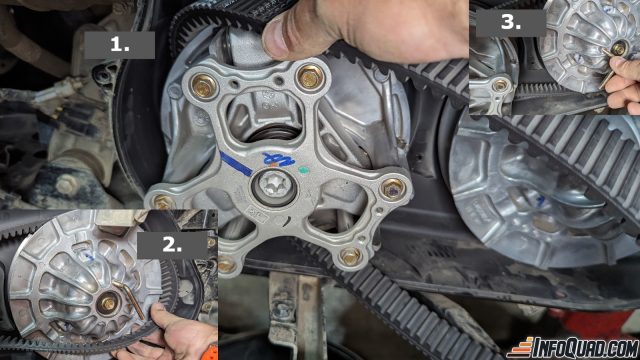
- The purpose of this task is to move the two plates away from the secondary pulley and free the belt.
- Locate the secondary pulley (largest pulley).
- Note the threaded hole near the center of the pulley.
- Insert the “L” tool into this hole and turn clockwise.
- If you feel resistance, or if you can turn the wrench effortlessly, the tool is hollow enough.
- Using your fingers, grip the belt at the base of the secondary pulley.
- Remove the strap by sliding it out of the plates and pulling it upwards from the bottom.
- Do the same to remove it from the primary pulley (the smallest pulley).
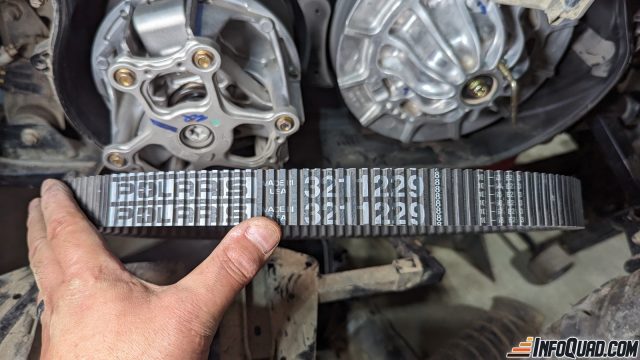
Now that you have your belt in hand, examine it to make sure everything is working properly. Take this opportunity to clean any accessible components.
# 7: Belt Installation.
Tools required :
- Threaded “L” wrench for opening secondary pulley (supplied in Polaris tool kit).
Steps :
- If the “L” tool has been removed, replace it in the secondary pulley, as in the previous step.
- Important: the belt has an operating direction. You must be able to read the markings on the belt.
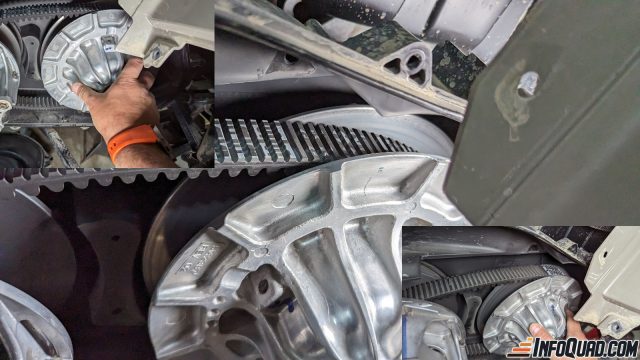
- Insert the belt into the primary pulley.
- Guide the belt towards the secondary pulley. Apply pressure and slide it between the two plates on the secondary pulley.
- Remove the “L” tool.
- Turn the secondary pulley until the belt is at its highest point in the pulley.
# 8: Remounting the guards and protective panels.
Tools required :
- Torx “L” wrench (supplied in Polaris tool kit).
- 10 mm socket, 12 mm socket, extension and ratchet.
Reverse disassembly steps :
- Belt guard installation.
- Installing the pulley protection cover.
- Install the vent pipe.
- Refit mudguard, side panels with plastic pins and Torx bolt.
- Put the bench back in its place.
- Set the ATV down on its wheels and take it for a test drive.
IMPORTANT: always follow the manufacturer’s specifications for tightening torques.
To Conclude
I’m convinced there are other ways to replace a drive belt. I’ve presented my way, all in the hope of giving you a guide or an idea of what to expect under those hoods.
But, as you can see, this task requires few tools and is not overly technical. If you’re unlucky enough to have to carry out these steps in the forest, you’ll need to add a few tools to your toolbox. A ratchet wrench and a few sockets will be needed. Dare to venture into the mechanics of your vehicle, and you’ll feel more confident. And you might even save some money.
I’ve made a video so you can follow the steps:
If you don’t feel confident about carrying out these tasks, don’t hesitate to contact your dealer. He’ll be happy to help.
Thanks to Polaris Industries for the Polaris Sportsman 570, which makes it possible for me to write these reviews.
Have a great Quad Season!