After several months in storage or after a big winter season, it’s time to take care of your ATV. Humidity, cold and even heat may have taken their toll during the past few months. Early season maintenance is necessary. This task is easy and can save you money. Here is a list of steps and points, feel free to modify or adapt it for your ATV. If you are not comfortable, ask for help from a specialist or your dealer. Use products recommended by the manufacturer.
Pre-Season Maintenance, Step One:
Cleaning:
- If possible, lift the ATV, and you will have better access to the components.
- Washing the ATV will make it easier to spot breaks, leaks and wear.
Pre-Season Maintenance: Second Step
Visual Inspection
Give yourself a starting point. Example: proceed from the front and continue to the back and back to the front. Take notes throughout the interview and remember nothing.
The front of the vehicle, the points to check.
Radiator.
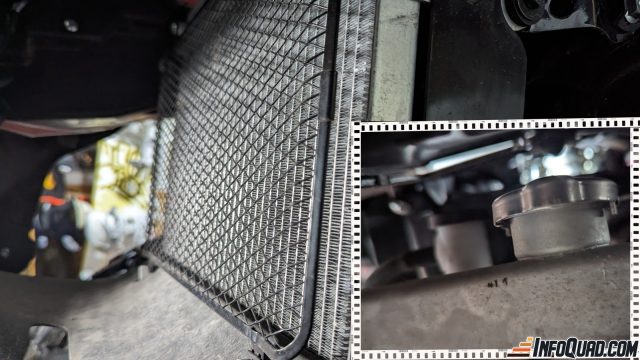
Located on the front of your ATV:
- Inspected the cooling system for leaks.
- That it does not involve physical damage.
- That the casings are in good condition.
The front wheels:
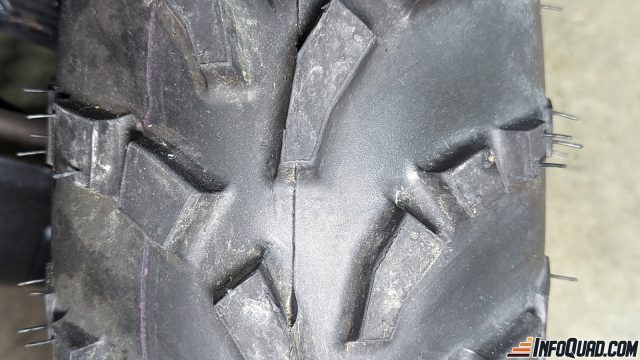
- Tire wear condition, examine studs, age cracks.
- Inspect for nails or screws that may be embedded in the tire
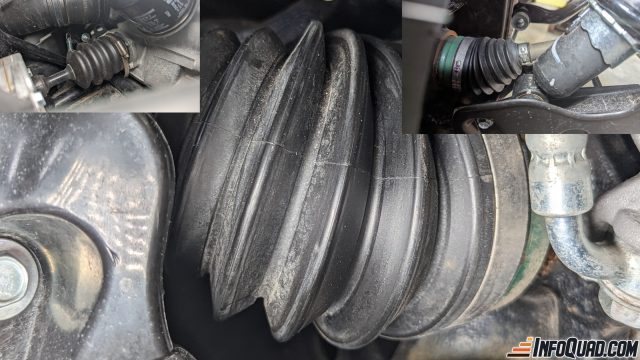
- At the back of the wheel, locate the gussets “The BOOTS” of the cardan shafts. They must not be cracked or damaged.
Brakes:
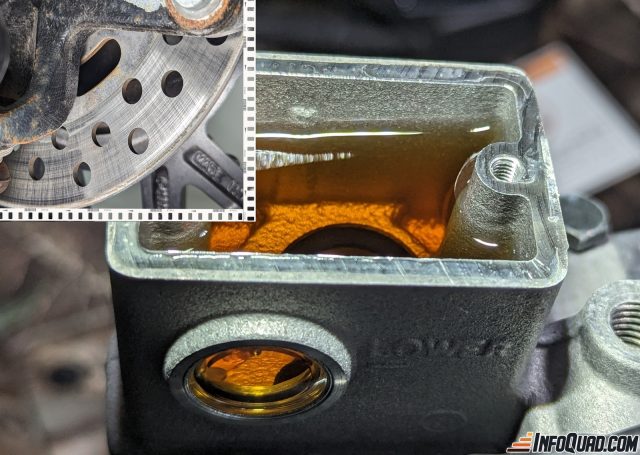
- The oil level must be at the right height in the tank.
- Cable condition
- The discs must not have any grooves, if there are marks, your pads will be damaged by this very fact.
- Make sure you have enough material. When in doubt, contact your dealer to get the straight goods.
Shock Absorbers, front and rear
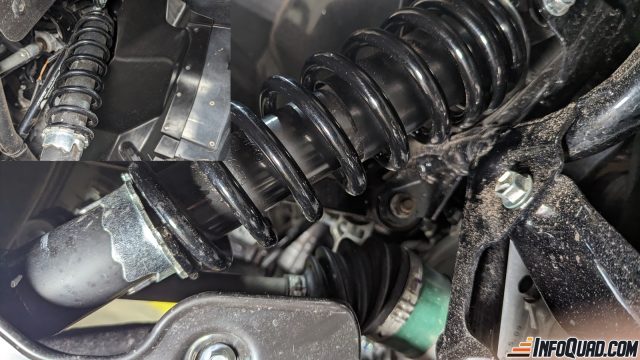
The front shock absorber is usually attached directly to the back of the wheel and is attached to the frame. The rear shock absorber is either central or at the rear of each wheel as in the front of the quad.
- Shake it out and there should be no play near the cushions where they are attached.
- The spring must be intact without breakage
- There should be no visible oil drips.
Center of the Vehicle
- Checking the condition of the plastic covers,
- Condition of the footsteps
- Handlebar condition and its components
- States of accessories that are visually accessible.
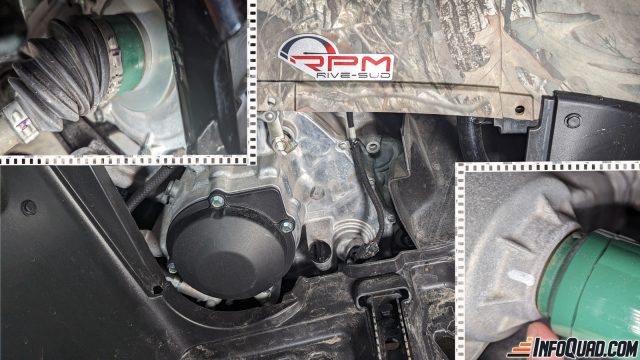
- Check on the engine and transmission (e.g.: cardan shaft exits and drive shafts). Check that there are no leaks or O-rings.
ATV: the back
Rear wheels
The process is similar to that of the front wheels except that the steering rods and the shock absorber(s) will not be positioned the same way. Checked the condition of the tires, the wear of the wheel bearings and the condition of the shocks.
Chain and axles
For ATVs that are equipped with a traction chain,
- The chain must be clean
- All meshes must be present.
For ATVs that are equipped with a Drive Shaft and wheel axle,
- Bellows are in place and in good condition
- No damage to the tree.
Pre-Season Maintenance: Step Three:
Mechanical inspection
The engine
Oils to check
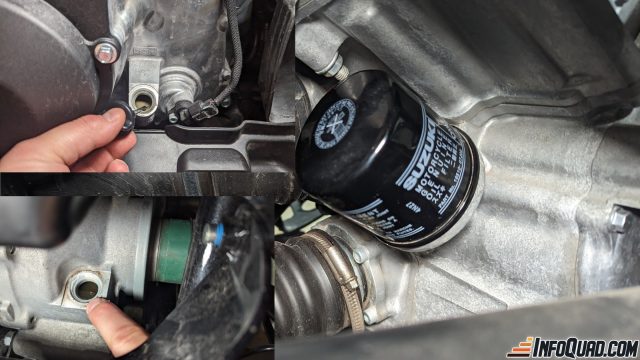
3 types of oil have to be changed:
- Replace motor oil and filter
- Replace differential oil
- Replace transmission oil
When changing oil, check for metal residue on the caps of the crankcases, which are usually magnetic. If you find that there are many metal particles accumulated in the caps, perhaps a sign of premature wear or internal breakage.
Coolant
- Locate your radiator cap or overflow tank.
- Check if the hot or cold level is correct.
- Notice if the color of the liquid is good. No oil or looks too light.
- A check with an antifreeze tester is always possible.
Spark plugs.
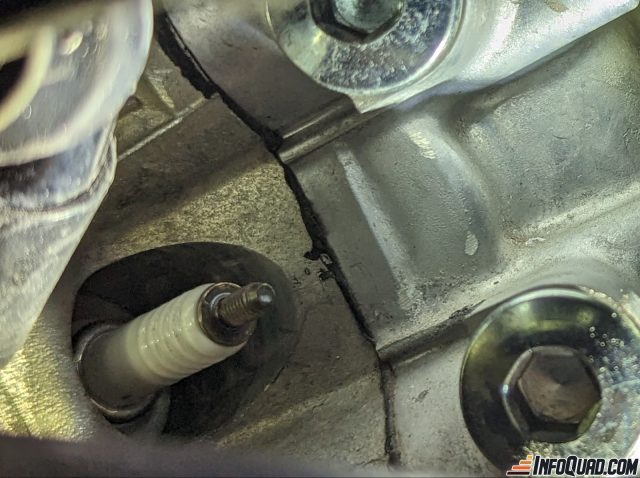
This type of vehicle lives a pretty hard life, the engine can idle for a long time. The engine may be under full load for the long haul and/or revving at full throttle for any number of reasons. For these reasons, I suggest that you replace your spark plugs at least every spring.
Why:
- The engine will perform better
- The engine will be more economical
- The engine will be less polluting
- You minimize the risk of breaking down when or where you shouldn’t.
Air Filter

Located under the bench
- Remove the screws or covers that protect it.
- Once accessible, if the filter is in good condition, clean it by applying air to the inside of the filter or just shaking it a little. Replace as needed.
- Clean the “air bowl”, dust debris or even possible mouse nests.
- A clean air filter: will give you more power, and extend the life of your engine.
The Battery, Lights and Charging System.
Battery
- A solid load will be required, and once completed, we will proceed to a capacity test.
- Start the engine and then stop it, perform this exercise 2 to 3 repetitions.
- Using a voltmeter, examine the reading. If the battery reads between 12V and 12.5V, your battery appears to be in good condition. If the values are lower, it may need to be replaced.
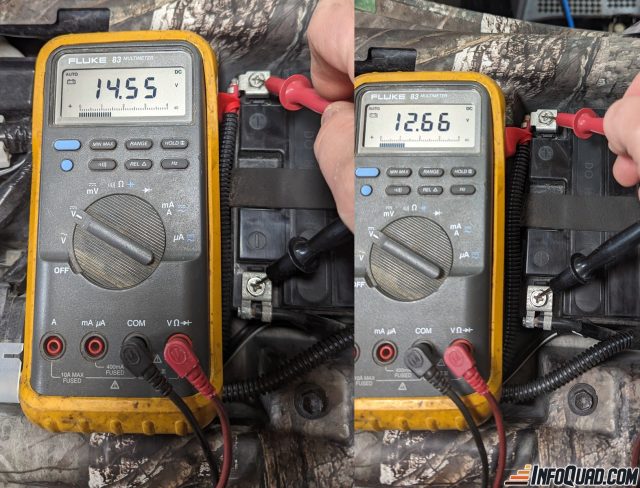
- Your charging system should provide approximately 14V to 14.4V between 2500 RPM and 3000 RPM. If more than 16V, your charge regulator is defective.
- Below 12V with the motor running, you should have your charging system diagnosed.
- If the battery voltage drops when the engine is stopped and does not hold its charge, the battery may need to be replaced.
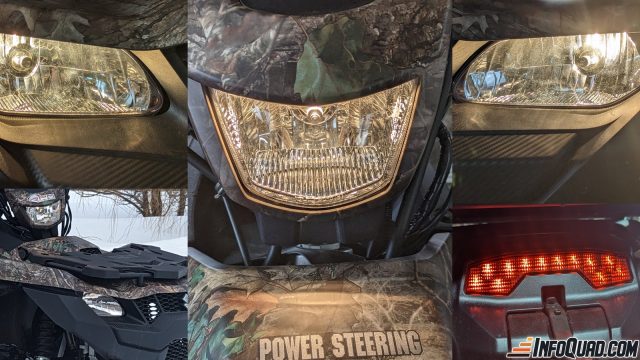
- Walk around the lights and see how they work.
Wheel axles (cardan shafts), driving shafts, rigid axle and drive chain.
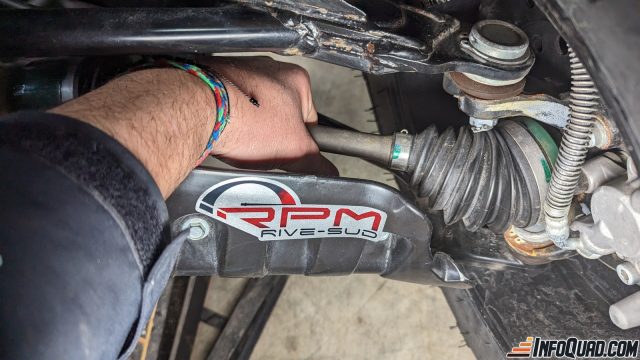
Wheel shafts :
- Locate the cardan shafts at the rear of the front wheels and also many models with independent rear suspension are equipped with them.
- Using your hands, grip the wheel axle firmly and shake it vigorously, everything should be firm and free of play.
Traction shaft
For a 4X4 ATV, you will have 2 shafts, one coming out towards the front of the engine and the other towards the rear of the engine. If your vehicle is a 2×4, you will have only one drive shaft coming out of the rear of the engine compartment.
- Rotate the wheel shaft back and forth without the wheels spinning. You are not supposed to feel any play in the universal joint. If there is any play, the seal will probably need to be replaced.
Traction chain and its gears.
- Examine where the gear and chain are placed and pull the chain outward. There should be no play. If there is play, your chain or gears may need to be replaced. Check with your dealer to find out what tolerance is allowed.
Wheel bearings and steering ball joints.
- Shake the wheel from left to right. You will be able to feel if the ball bearings or the steering joints have no play. Everything should be solid and free of play.
Greasing and lubrication.
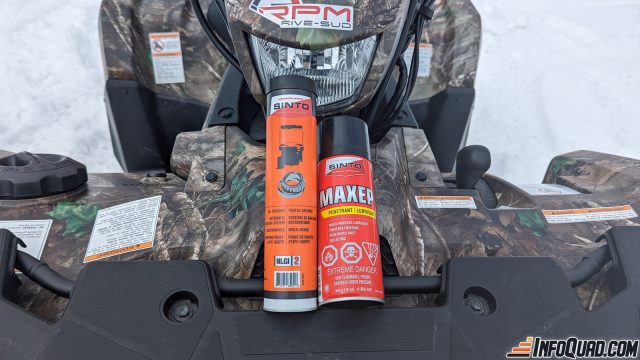
Walk around the visible ball joints and suspension arms, look for grease points and apply grease. A penetrating spray lubricant can be used at the junction of moving and stationary parts.
Here is an idea for a maintenance guide to starting the season off right. I’ve covered the most vulnerable or wear-sensitive areas in a general way. You work hard with your ATV, Bolide, Quad… call it what you will. By doing early season maintenance and some periodic checks, you will be aware of the condition of your ATV. Always use products recommended by the manufacturer or appropriate for the application. If you are not confident in doing these tasks, contact your dealer, and he will help you.
Have a great Quad season!